

This post may contain affiliate links. Read our full disclosure.
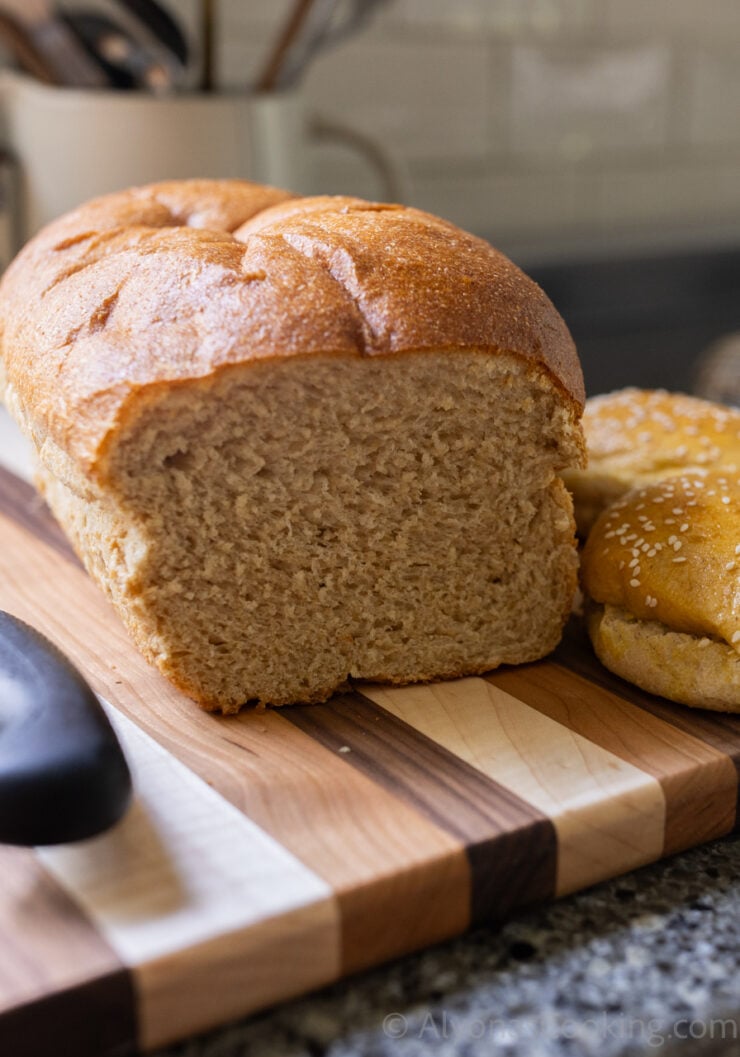
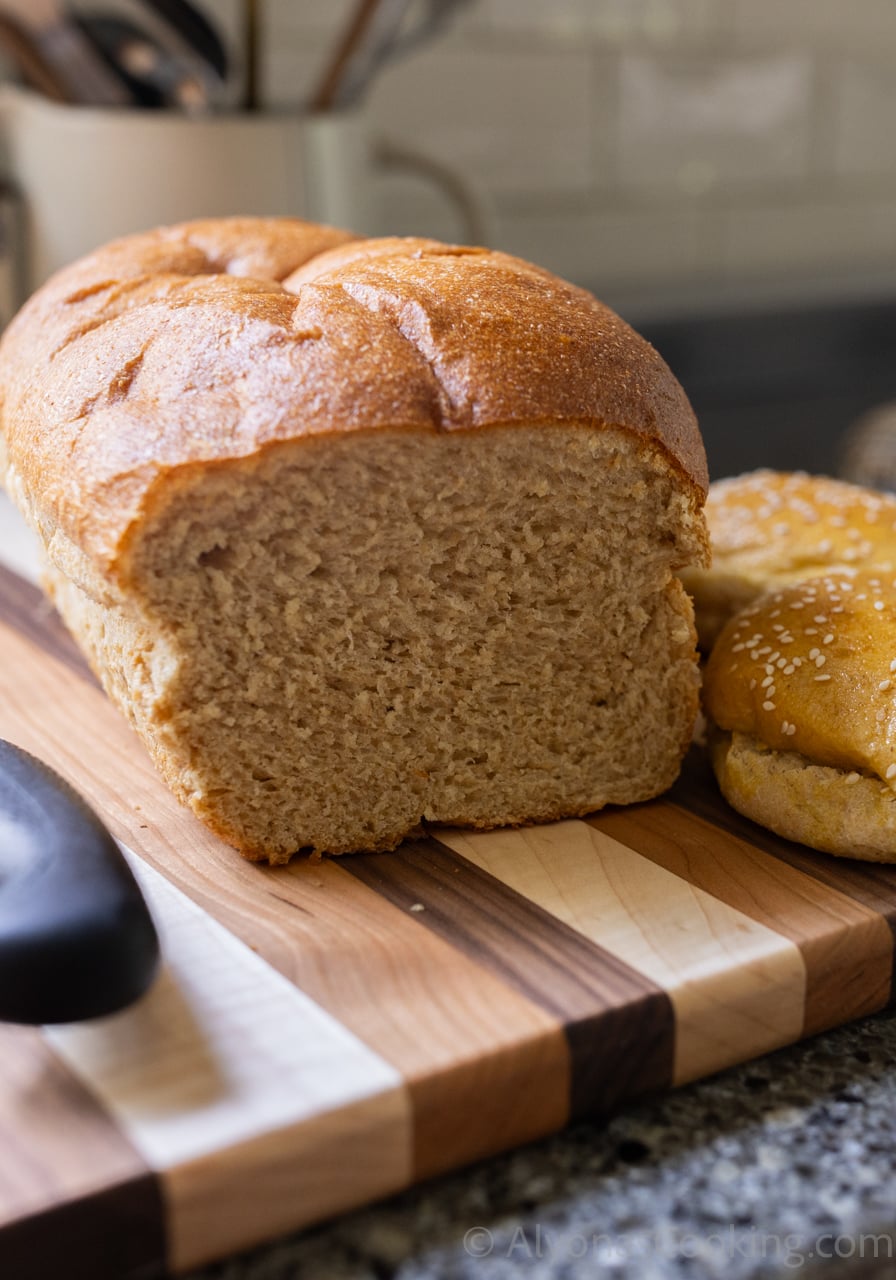
I don’t know how many times I’ve made this sourdough sandwich bread. It’s been my go to recipe for hamburger buns and cinnamon rolls. It also, uses all 100% fresh milled flour, and makes super fluffy and soft bread (buns/rolls)!
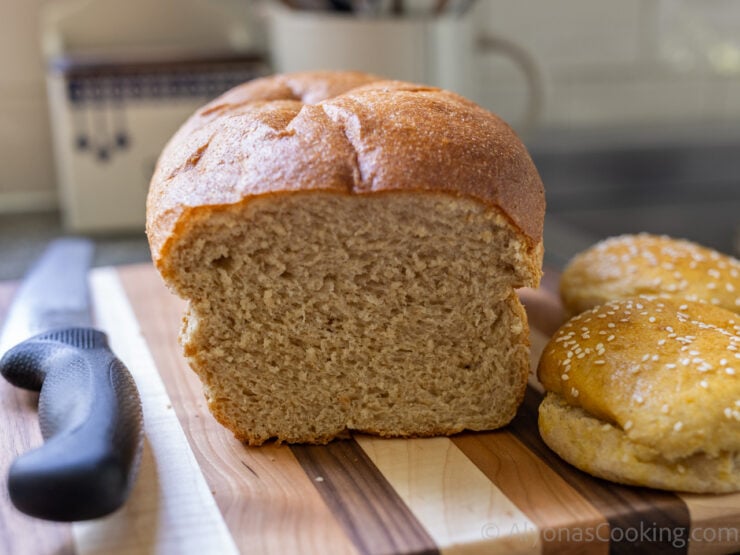
This recipe calls for added yeast in conjunction with sourdough and the potato flakes ensures softness! If you are looking for sourdough sandwich bread with no added yeast then check out this recipe.
I’ve mentioned this particular potato sourdough bread in my weekly newsletter several times and thought it was finally time to share it!
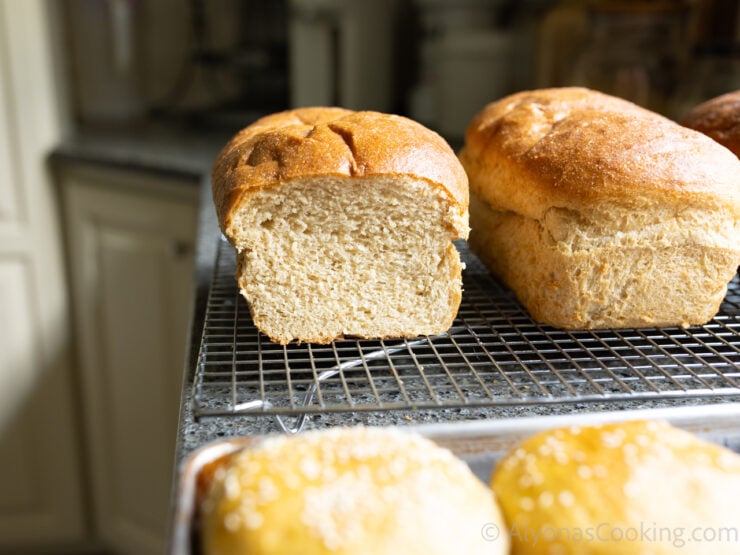
My mother-in-law even came by, saw the bread cooling in the loaf pans, and asked if I mixed any white flour in? Yes, they were that fluffy!
It truly makes the best sandwich bread with freshly milled flour!
Watch How Alyona Makes the Softest Fresh Milled Flour Bread!
Potato Flakes
If you’ve been around the Mennonite community long enough, you will notice some of their softest breads have potato flakes.
Think of potato flakes like a Tangzhong method, minus the actual step of making a paste.
Because who wants to do that?
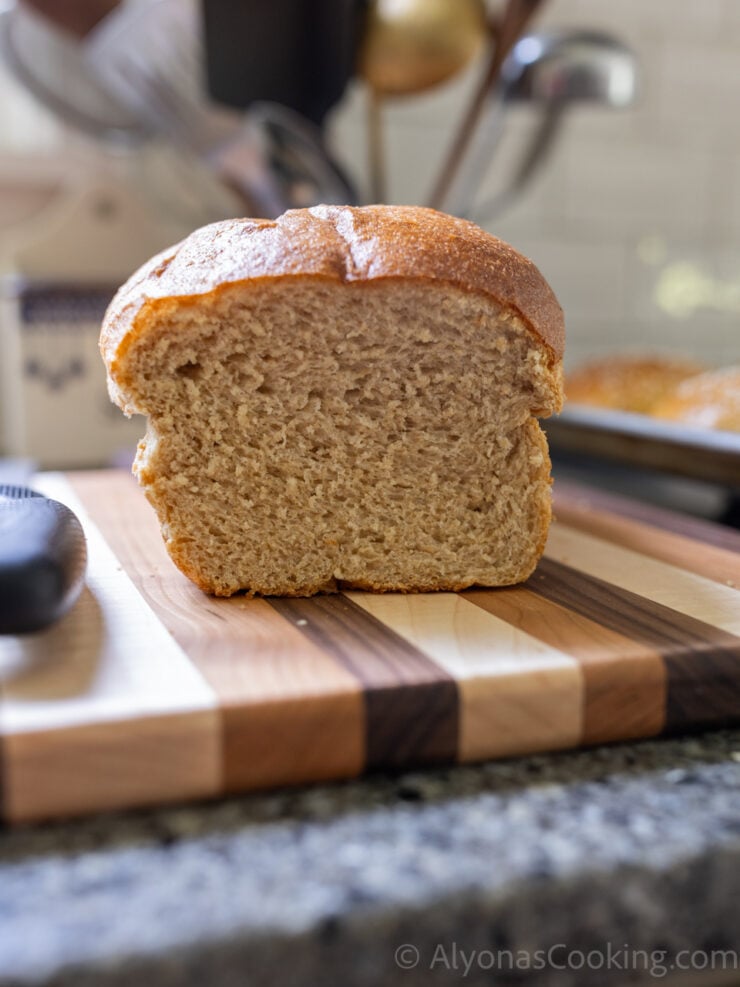
Potato flakes are the secret to tender, ultra-soft breads and it’s been proven by this Subway Bread Recipe (one my most popular recipes)!
Milling Your Own Grains and Benefits
I have a fresh milled flour buddy… My good friend and I always cross share recipes that we’ve been loving (especially with fresh milled flour).
Milling our own grains has been a staple in our homes and she’s even had the privilege to contribute to a local bakery with her freshly milled flour, baked goods.
And so, one day she mentioned this very, “SOFT” sandwich bread recipe. She told me it was from the Prairie Flour Cookbook, and that it was “SO SOFT”! I thought why not give it a try?…
I mean, we already discovered a good everyday sandwich bread recipe using only yeast that was already working for us but she did mention, “this bread was like really, soft”.
And so, I tried this sourdough potato bread with all freshly milled flour. It had the addition of dry potato flakes, and sourdough. Then on top of that it called for dry yeast.
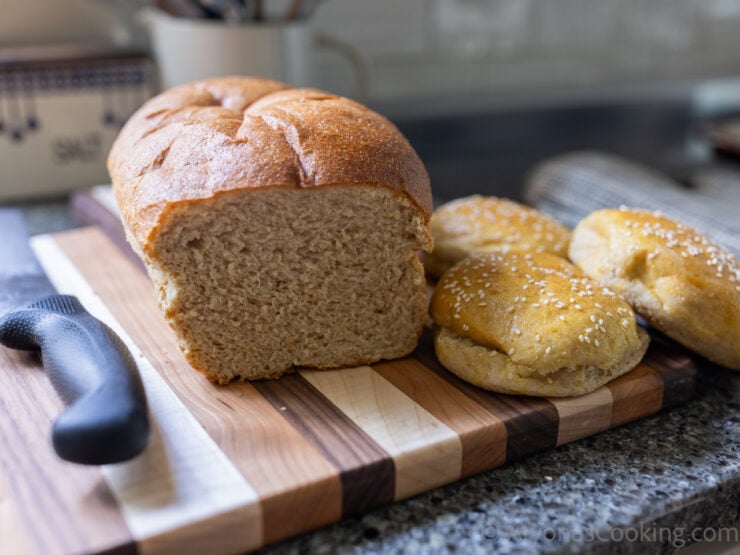
In the cookbook it was a sandwich bread recipe with instructions to make a homemade potato starter. I even made the potato starter mentioned in the cookbook (highly recommend, it’s only a two day commitment to make from scratch). But you can totally use a regular starter.
Then, when my first loaf of bread came out of the oven… I was immediately won over by the feather-light loaf! I knew it was going to be one of the softest sandwich breads and it was!
Ever since, I have been faithfully making it as our go-to sandwich bread. It is incredibly soft, cloud-like light, and so nutritious! Truly a wonder bread!
Maybe you have a recipe that works, but I’d still”try it”. You will not regret it!
Potato Starter vs Sourdough Starter
My friend and I have both made the potato sourdough starter in the cookbook. However, we have both tried this recipe with regular sourdough starter and could not really tell a difference in the taste.
Initially, we were drawn to this recipe because the potato starter did not impart any sour taste to the bread. Which makes this bread a good option to win over people to sourdough bread.
I’d say it’s a good beginner’s recipe for people who cannot stand any sour after taste from sourdough.
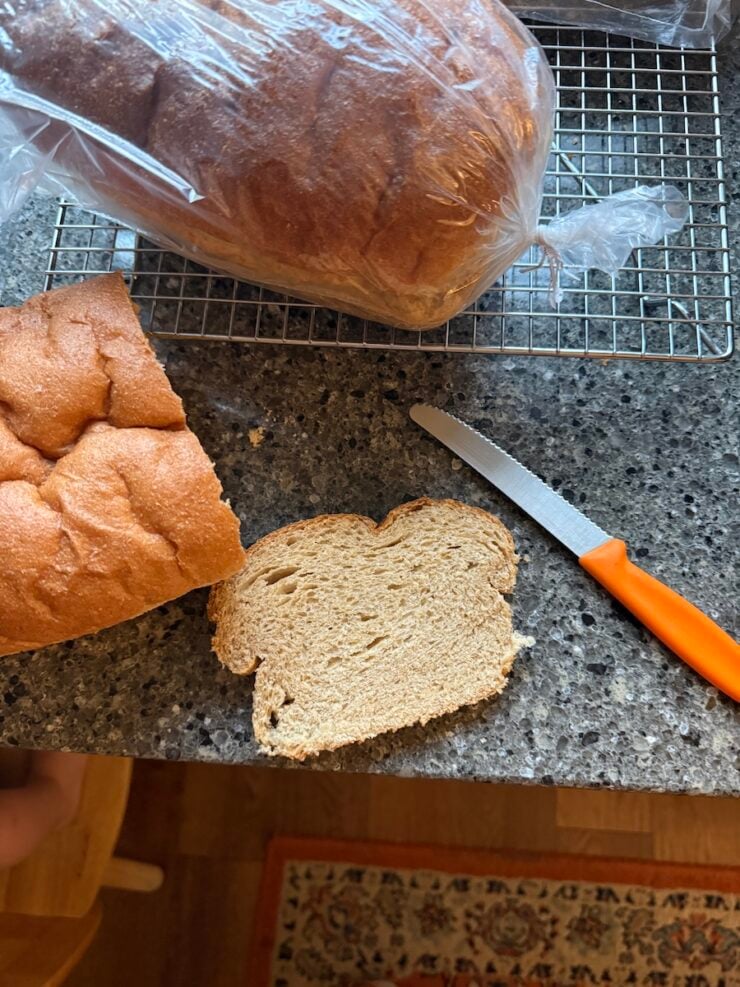
I’ve also realized that if you maintain a starter on a weekly basis then, it will not give off that sour taste. We could not tell the difference with the potato starter vs our regular starter (as long as both are fed regularly, the bread shouldn’t be sour).
Now, if for reason you want to make sandwich bread without sourdough then this sandwich bread recipe is a good everyday soft and fluffy bread using yeast.
Sourdough definitely adds moisture and makes this bread super fluffy! I highly recommend using it even if you need to ask a friend for a starter or if you want to make your own.
Hope you give this potato sourdough sandwich bread a try and don’t forget to drop me a comment, below if you did!
Everything You Need! (Mise en Place):
Equipment:
- Three 9×5 loaf pans (I love these stoneware pans)!
- Silicone mat for shaping dough
- Bench Scraper
- Heavy-duty stand mixer
The Best Sourdough Sandwich Bread Recipe: Ingredients & Substitutions
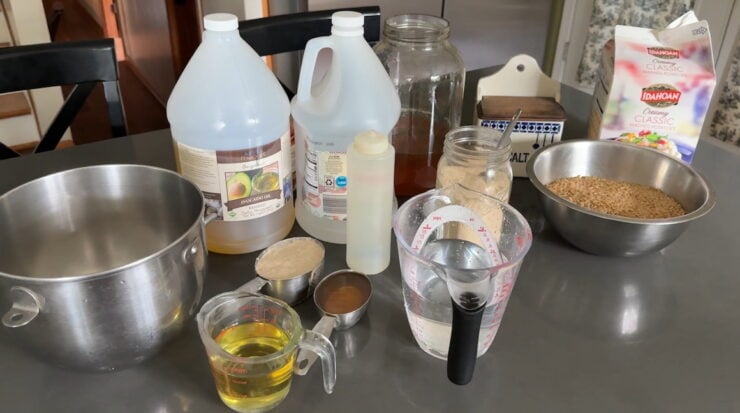
- Sourdough starter- use any active and bubbly sourdough starter! If using discard (add 2 Tbsp yeast).
- Cool water- is very important for the bread not to tear. Because fresh milled flour comes out of the grain mill warm this is a crucial step to take for success!
- Dry active yeast- is added to the dough for extra fluff and softness. I do not recommend that you skip this ingredient!
- Salt- I use a high quality sea salt and add it to the wet mixture in no given order! Although, I do prefer to add it last.
- Honey- choose a runny liquid-like honey. I have used a sugary, thick kind (just use a scant 1/2 cup).
- Avocado oil- or any mild-flavored oil. Pure olive oil can be very strong.
- White distilled vinegar- tenderizes the gluten strands, makes softer bread, and can help with shelf life.
- Instant potato flakes- the main ingredient here! Bread made with it always adds softness!
- Fresh milled flour- I used all hard white wheat berries. Weigh the grains, then run them through a grain mill to make fresh milled flour. I always use up everything I grind and go by the grams here (not measuring cups).
How To Make Sourdough Sandwich Bread
Let’s walk through how to make potato sourdough sandwich bread step-by-step, and don’t forget to watch the video of how I make it from start to finish.
Feed Your Starter
I have two starters, one with potato flakes and one regular sourdough starter. I like to exclusively use the potato starter for this bread (it leaves no sour taste in the bread).
However, so, as long as your regular starter is fed weekly, it should not impart any sour flavor to this bread. So, the choice is really yours in which starter to use.
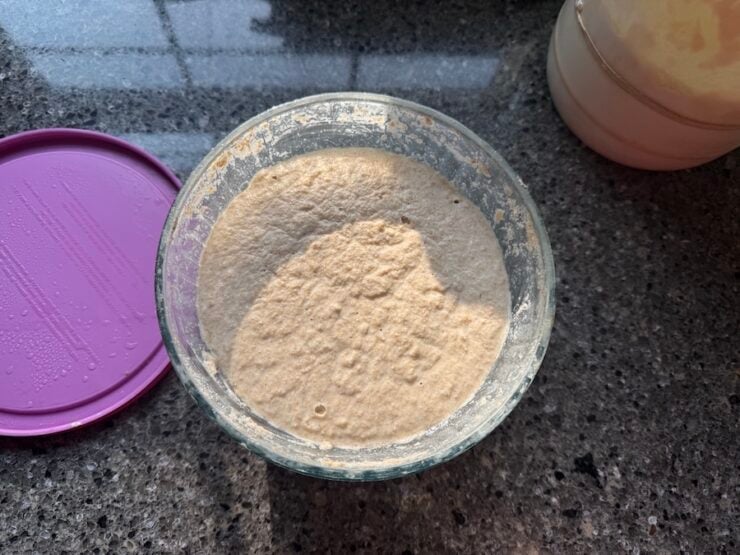
For the potato starter, I’ll take it out of the fridge the night before feed it with 1/2 cup of freshly milled flour, 1/2 cup water, and 3 T instant potato flakes (this feeding suits about 1 cup of starter).
Then in the morning I’ll add 1/2 cup fresh milled flour (hard wheat) and water. Then start making my dough 2 hours later.
Now, if using a regular starter, I’ll take it out of the fridge the morning of baking, feed it with 2 heaping cups of flour and water, then call it a bake day and make various doughs, including this bread. I usually keep about a cup or two of starter in the fridge so, this feeding suits that amount.
It only takes about 4 hours to activate my regular starter, meaning, I can start making my doughs after that time mark. Example, if I fed it at 5:00 am, I’d start my dough at 9:00 am.
Regardless, of how you want to go about, make sure your starter is fed and active. And if you forgot about feeding it, use discard starter (just increase the yeast to 2 Tablespoons)!
Mill the Wheat Berries
I always measure out the fresh milled flour in grams for this sandwich bread recipe. Meaning, I always take out my scale, weigh my wheat berries to 1,040 grams and run that through the grain mill.
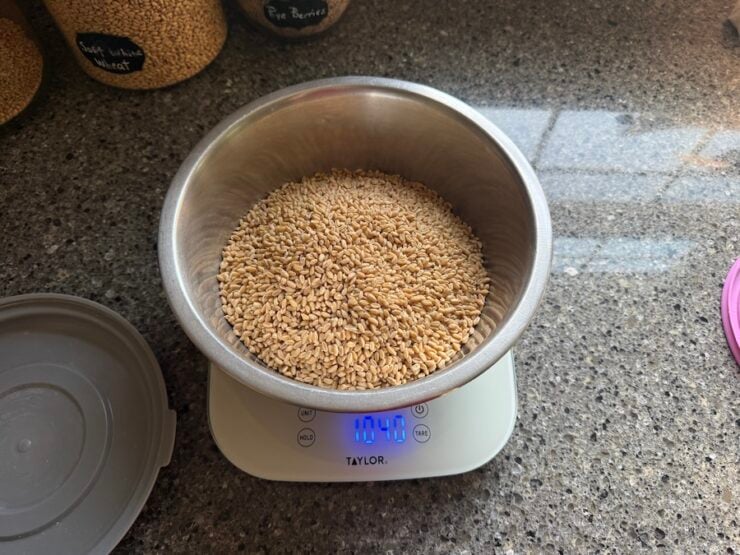
That is exactly how much flour this recipe uses. It’s about 7-8 cups of fresh milled flour.
So, if your wheat flour is already milled, weigh out 1,040 grams then proceed with the recipe.
I recommend going by the grams, then cups because this dough starts off sticky, and by the end of kneading, comes together beautifully!
Make the Sourdough Sandwich Bread Dough
With an active starter and fresh milled flour, you are ready to make the dough. This recipe makes a great healthy vegan/vegetarian option as there are no eggs!
Measure out 3 cups of cool water into the bowl a mixer. A stand mixer is not required but it will get the job done much easier.
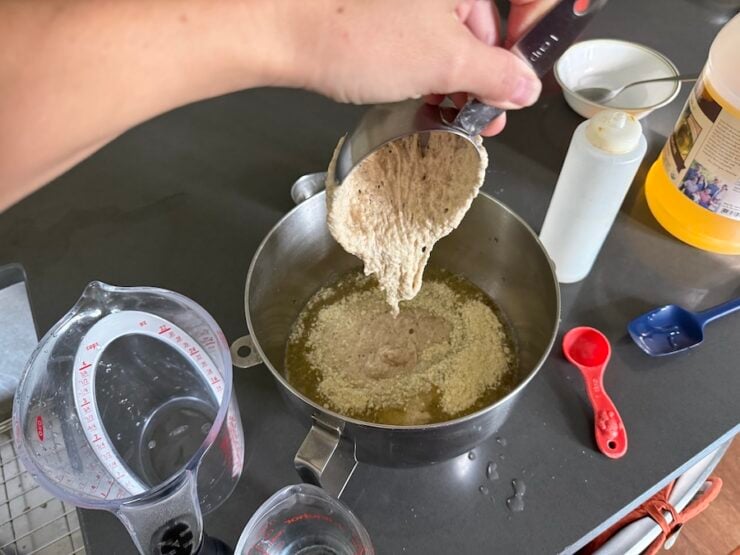
Cool water is a must if using warm, fresh milled flour. Otherwise use warm water if your flour is cooled off.
This is because dough can get too warm when kneading, hindering proper gluten development. My friend has noticed that when she started using cool water with her fresh milled flour doughs, they stopped tearing, when baking.
To the cool water add the dry yeast, salt, honey, avocado oil, sourdough starter, white distilled vinegar, and potato flakes.
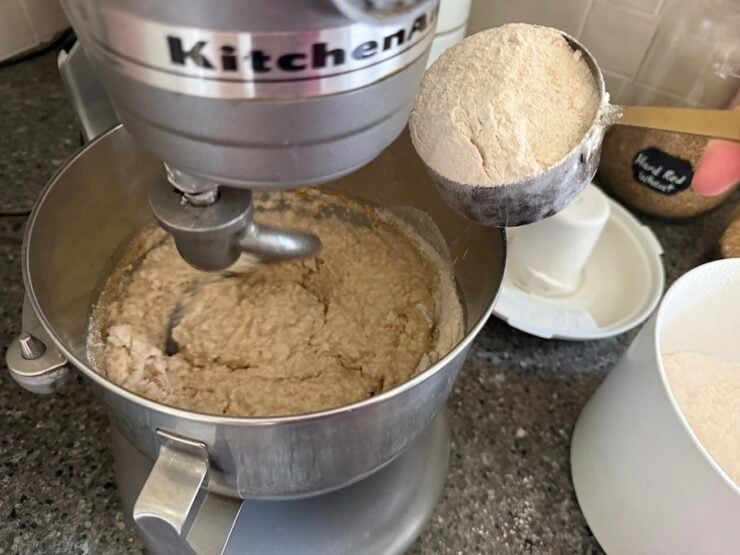
With the hook/dough attachment (I use a Kitchen Aid), add the fresh milled flour one cup at a time. After the last cup of flour was added set the timer for 8 minutes and let it knead.
Don’t be tempted to add more flour. The dough first looks very sticky but by the end of kneading time, pulls together nicely.
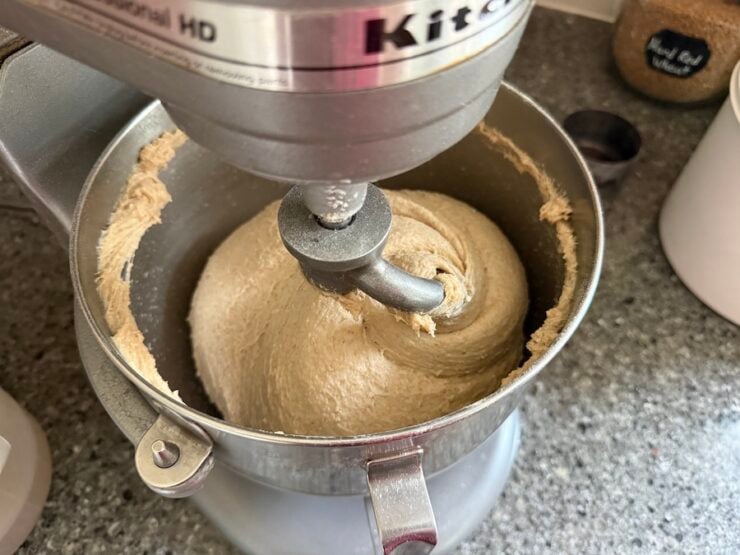
Rise
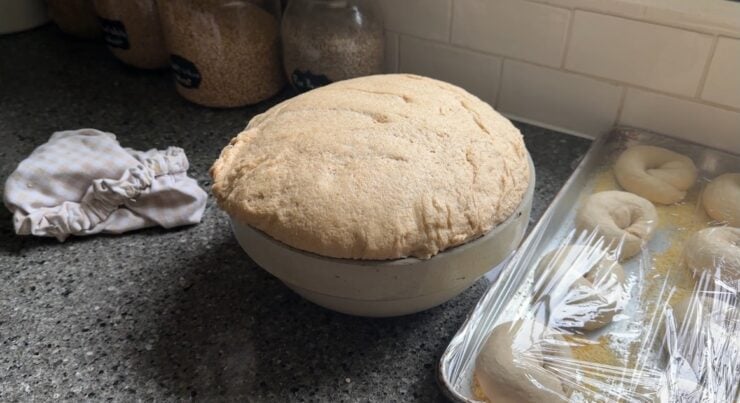
Cover the bowl of dough with plastic wrap and let it rise in a warm spot for up to 1 hour (or two hours if it’s really cold).
Shape
After the dough has risen and doubled in size, it’s time to make sandwich loaves.
I like inverting the dough onto an extra large pastry silicone mat (easy clean-up and no additional flour is needed).
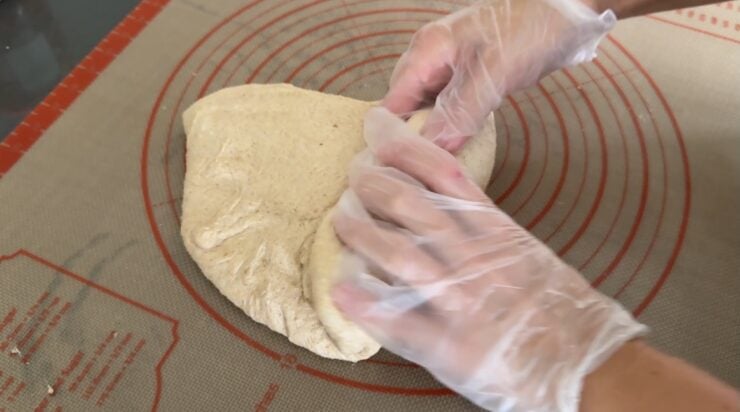
Divide the dough into three equal pieces. Pat each piece down into a rectangle shape and roll up, jelly-roll style.
Place each rolled-up dough piece into a greased loaf pan. I just spray three 9×5 pans with avocado cooking spray.
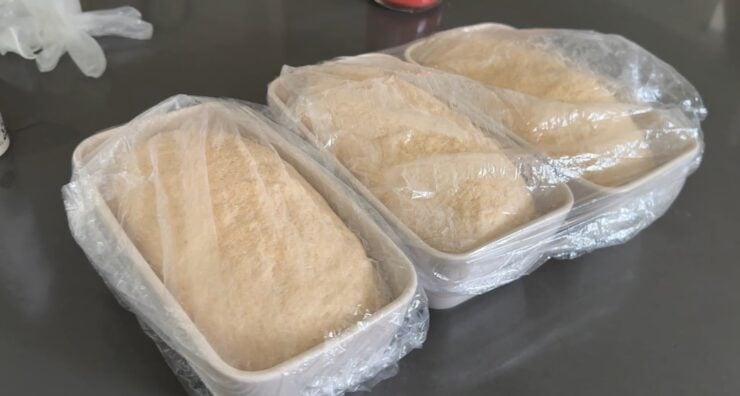
Let the loaves rise in the pans for 1 hour. I often cover the bread pans with these disposable shower caps.
My friend and I have bought these stoneware loaf pans and absolutely love them! It’s what I always use for this sandwich bread! In fact I bought one to try it out and now own three! Love them!
Bake
When your dough has doubled and risen slightly above the rim of the bread pan, preheat your oven to 350°F.
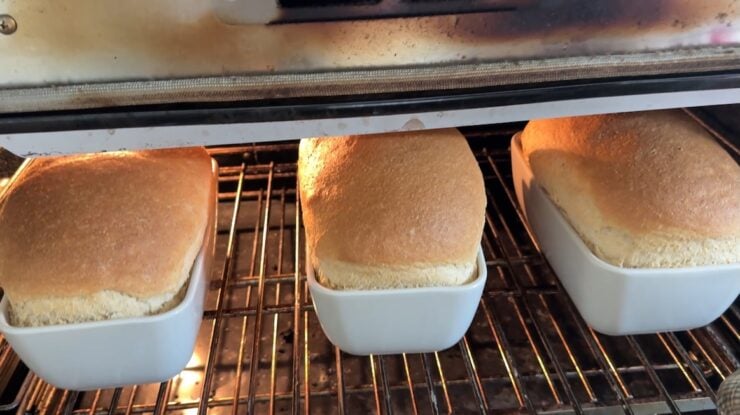
Bake the loaves for 35-40 minutes or until the internal temperature reads 190°F, when using a digital thermometer.
Butter the Tops
After the sandwich loaves have baked, remove them from the oven and immediately smear some butter over the entire tops. This makes the crust soft and so flavorful.
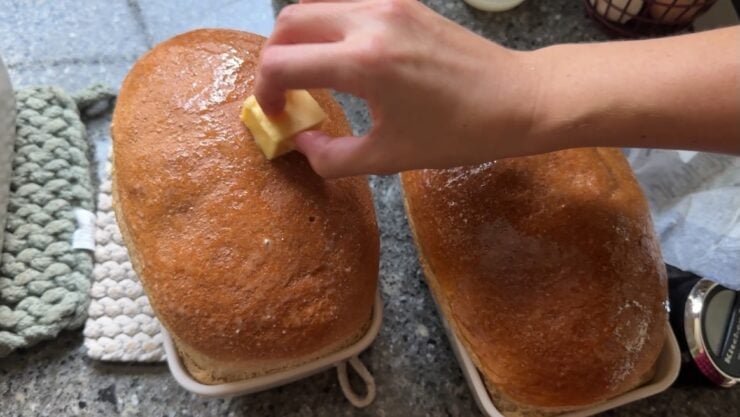
I just unwrap a block/stick of butter and smear as much as you need to coat the top. I usually, keep salted Irish butter on hand so, use whatever you have!
Cool the Bread
This is very important, because if you try to remove the loaf from a glass or stoneware bread pan, it’s going to stick!
I’ve found that leaving the bread to cool in the bread pans for at least 10 minutes will help the loaves come out easier.
So, cool the bread for 10 minutes (set the timer) and then using a sharp knife, run the blade around the sides. Slowly pop them out using a knife and place them on a cooling rack to finish cooling off.
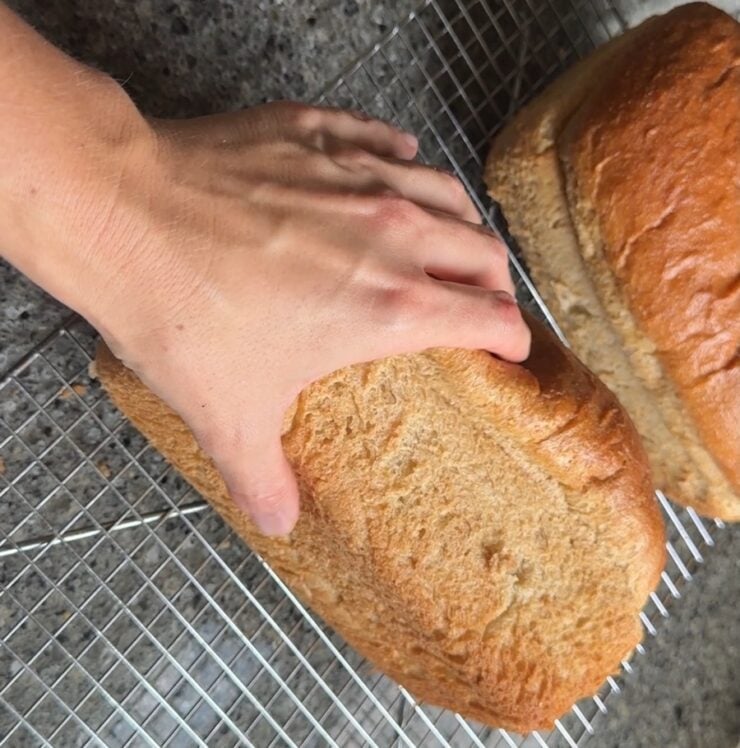
It works every time! If I tried removing them any sooner they most likely tore so, I thought I’d share my experience.
Store
To keep this bread extra soft store these loaves in plastic bread bags as soon as they are room temperature but still a little warm.
That way it creates a little steam in the bread bags as they continue cooling. I’ve noticed they are super soft if I hide them in bread bags before the crust gets hard and crisp.
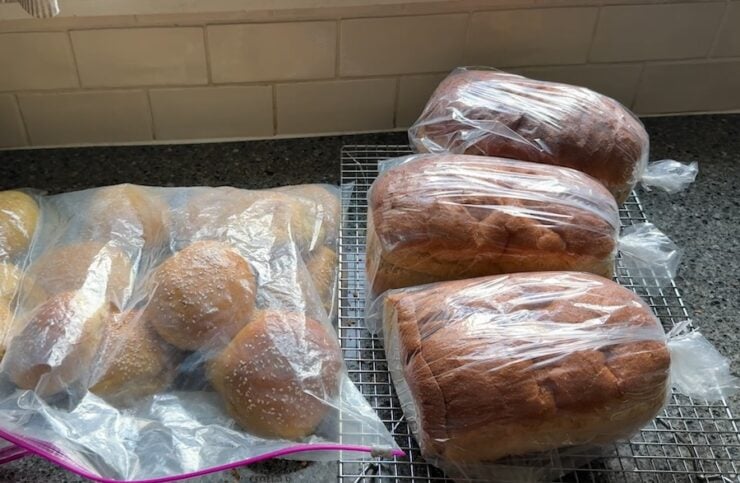
Once completely cool (2-4 hours later), you can either freeze the loaves or leave at room temperature for up to 3 days.
Enjoy!
Well I hope I motivated you to try an amazingly soft and fluffy bread with no added eggs, lecithin, or wheat gluten. Just simple and wholesome ingredients (which makes fabulous bread)!
Drop a comment below if you made this! I can’t wait to hear from you!
FAQ’s About Potato Sourdough Sandwich Bread
How Do I Make A Potato Starter?
To make a potato sourdough starter, mix together 2 cups cool water, 1/2 Tbsp dry active yeast, 1/2 Tbsp salt, 1/4 cup sugar and 1 cup instant potato flakes.
Cover loosely, and let that mixture ferment 24-48 hours, room temperature.
After 24 hours add 1 cup of fresh milled hard white wheat flour and 1/2 cup of water.
Once the mixture gets active and bubbly you can use it or let it ferment on the counter for another 12 hours.
If you let it go another 12 hours, add 1/2 cup fresh milled hard white, then use once it’s active. (No water needed).
Always try to leave about a cup of starter to keep in the fridge. Starter should be kept in the fridge for 1-2 weeks max.
To bake with it remove the starter out of the fridge the night before. Feed it with 1/2 fresh milled hard white wheat flour, 1/2 cup water, and 3 Tbsp potato flakes. Let it activate overnight.
In the morning add another 1/2 cup of fresh milled flour and water. Starter should be ready to use in two hours.
Can I Use a Regular Sourdough Starter?
Yes! My friend and I have made this recipe using regular active sourdough starter. It’s very hard to tell a distinct difference. So, much that we’re thinking to just go back to using our sourdough starters and not keep up with the two 🙂
Why the Added Yeast?
Dry active yeast makes this bread super fluffy and soft like store-bought bread. I think the addition of sourdough and potato flakes contribute to this softness as well as the vinegar. So, don’t omit these ingredients!
Will this Dough Work for Buns or Rolls?
Yes! I have successfully made the fluffiest cinnamon rolls and hamburger buns using this dough recipe!
I sometimes like to mix and match, where I make one piece of dough into a loaf and the remaining dough into cinnamon rolls. Or double the dough and make three loaves then one batch of hamburger buns.
This dough freezes very well. For cinnamon rolls, I’ll roll them up and place them into round pans, then flash freeze them. Cover and keep in the freezer until needed. Dough only needs a few hours to thaw.
Join My Weekly Newsletter
New recipes, homesteading, family life, what we eat in a week, and hospitality tips.
Pin this now to find it later

Softest Potato Sourdough Sandwich Bread with Fresh Milled Flour
Equipment
- 1 extra-large pastry silicone mat, (for shaping dough)
Ingredients
- 3 cups cool water, (not too cold)
- 1 Tbsp dry active yeast , **See notes
- 1 Tbsp salt
- 1/2 cup honey
- 3/4 cup avocado oil
- 1 Tbsp white distilled vinegar, (for softness)
- 1 cup active sourdough starter , (see notes for using discard)
- 1 cup instant potato flakes , (the dry flakes)
- 1,040 grams hard white wheat berries , (freshly milled)
Instructions
- Weigh the wheat berries on a scale to get 1,040 grams. Run them through a grain mill to make fresh milled flour (it should make 7-8 cups of freshly milled flour and all of it will get used).

- To the bowl of a stand mixer: add 3 cups cool water, 1 Tbsp yeast, 1 Tbsp salt, 1 Tbsp vinegar, 1/2 cup honey, 3/4 cup oil, 1 cup starter, and 1 cup instant potato flakes. Mix over low speed adding 1 cup of flour at a time until all the flour is incorporated. After the last cup is added, knead the dough for 8 minutes.
- Cover the bowl and let the dough rise for 1-2 hours.

- After the dough has doubled in size transfer it to a work surface (I like to use a large pastry mat so I don't use additional flour). Divide dough into three equal pieces. Pat each piece into a rectangle and roll-up, jelly roll-style.

- Place dough into greased 9×5 pans. Let them rise up to 1 hour.

- Bake at 350°F for 35-40 minutes or until the internal temperature of the bread reaches 190°F.

- Immediately, butter the tops by smearing a stick of butter, just enough to coat the tops. This will make for a softer loaf/crust.

- Cool bread in the pans for 10 minutes. Then run a knife around the bread pan and remove the bread. Place loaves on a cooling rack and allow them to cool. Enjoy!

Notes
- If using discard sourdough or if you’re sourdough doesn’t look that active use 2 Tbsp of dry active yeast.
- For softer loaves as soon as the loaves cool off a little on the cooling rack (but are slightly warm), place them into bread bags to create a little steam. This softens the bread!
- This dough and bread freezes well. I often make cinnamon rolls and freeze them unbaked. Thaw for at least 3 hours before baking. To freeze already baked bread, store in bread bags or freezer bags for up to 3 months. Try not to freeze for too long, to avoid freezer burns.
- I learned that when cooling bread in glass or stoneware, for at least 10 minutes before removing them, keeps them from tearing. It works every time!
- Feel free to mix and match whole grains like using hard red wheat, etc…I recommend any hard wheat variety for yeasted breads.
- Not necessary, but I like to use food-grade gloves when shaping the dough. This dough is slightly tacky to work so, using gloves makes the process much easier.
Nutrition (per serving)
Tried this recipe?
Mention @alyonascooking or hashtag #alyonascooking.