

This post may contain affiliate links. Read our full disclosure.
We are homesteaders, so fermented foods have a special place at our farmhouse. It’s also an efficient way to preserve the vegetables that come in and the homegrown cabbage that we plant. If you want to hear how my Ukrainian grandmother preserved a year’s worth of sauerkraut, read about it here.
Believe it or not, a good sauerkraut recipe can be hard to come by. Many people wing it with the salt proportions, and that could work, but keep in mind that every two heads of cabbage can be so different in weight that it can change the entire outcome.
Whenever I wanted to make traditional sauerkraut like my Ukrainian grandma would make, it would often fail (which I think was a lack of salt, now that I compare it). And come to think of it, many of the passed-down recipes were by the cook’s instincts and eye, so it was no wonder.
Needless to say, I settled on this Ukrainian sauerkraut recipe passed down from my aunt, which has an addition of water because it worked better for the time being.
Well, that all changed…
The Best Sauerkraut Recipe:
I love that this sauerkraut recipe requires no refrigeration! This salt ratio always works to safely ferment cabbage for longer storage.
The story behind this saurekraut recipe goes back to when a Mennonite friend came by to pick up some milk kefir grains. In exchange, she brought some of this sauerkraut, which she casually mentioned that she stores in her basement without refrigeration.
We are both very health-minded, and when she said that, I was intrigued…
I decided to open the jar of her translucent, golden-pale green sauerkraut and tried it. I have never tasted as delicious homemade sauerkraut, I mean it was perfectly tart, tangy, and crunchy, everything you’d want in sauerkraut!
So, I eagerly asked for the recipe and am sharing it with you today, including all of my sauerkraut tips that I’ve observed over the years to make this as helpful as possible.

Homemade Sauerkraut Benefits:
Sauerkraut is a staple in our Ukrainian cuisine. We make this bratwurst and sauerkraut sandwich (inspired by the Ukrainian flea markets), add it to soups, fry it with fresh cabbage to make braised cabbage, and so much more!
We also stuff the saurkraut fried cabbage mixture into dumplings and fried dough. My point is that sauerkraut has many advantages, including many health benefits, which you could read about here. It’s probiotic-rich and gives a robust, tangy flavor to foods.
Best Cabbage To Use For Making Sauerkraut:
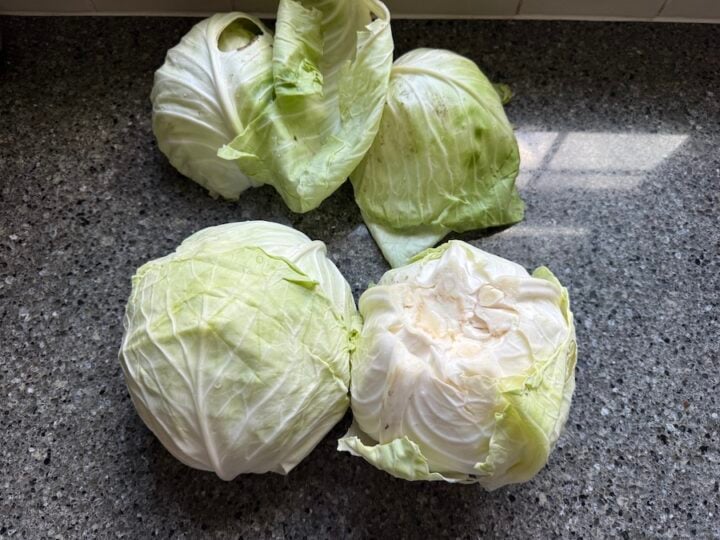
We grow stonehead cabbage. It’s one of the easiest cabbage seeds to grow and is resistant to many diseases. The heads get very large, and I love the pale white flesh, which is dense and crunchy. Any winter cabbage variety that has tightly packed heads is ideal for making sauerkraut. Since the cabbage is fermented, you’ll need something with sturdy leaves to withstand all the massaging, pounding, and packing. If you can’t grow cabbage, we like this Organic Cabbage from Azure Standard.
If you’ve been intimidated by raw fermented foods, sauerkraut is a good place to start and is very simple.
Here is my method of making sauerkraut at home!
Mise en Place
Equipment:
This sauerkraut recipe calls for simple equipment and the use of your hands (the bare minimum). However, you can use a weights, pounder/tamper, crock, and air-lock lids to be more equipped.
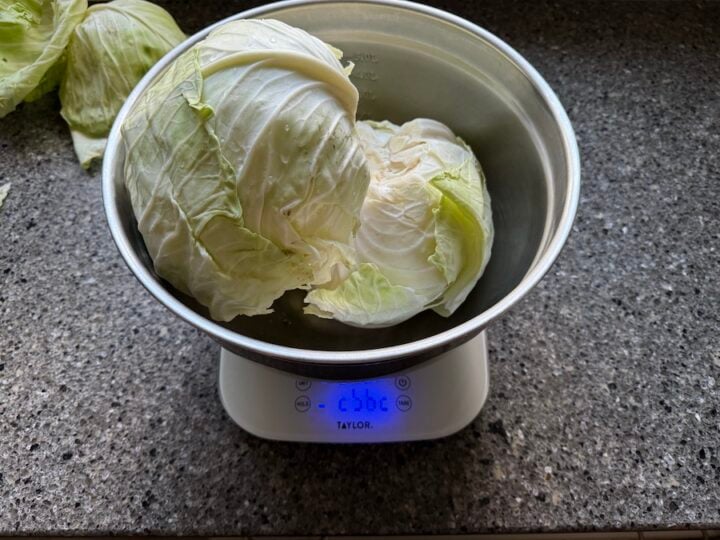
- Scale
- Extra Large Mixing Bowl
- 3 or 4-quart-sized mason jars and lids
- A Pyrex baking dish or anything to hold the liquid that seeps out during fermentation
Ingredients:
- Redmond Real Salt– or any natural mineral salt. Do not use iodized salt
- Winter Cabbage Variety- any head of cabbage with dense, tightly compact leaves. The whiter the cabbage, the better.


Pro-Tip: Use smaller quart-sized jars for making homemade sauerkraut; this way, you can go through it quicker and avoid waste. I also like the narrower regular mouth canning jars, as they help the liquid stay down better when using a cabbage leaf to weigh down the sauerkraut.
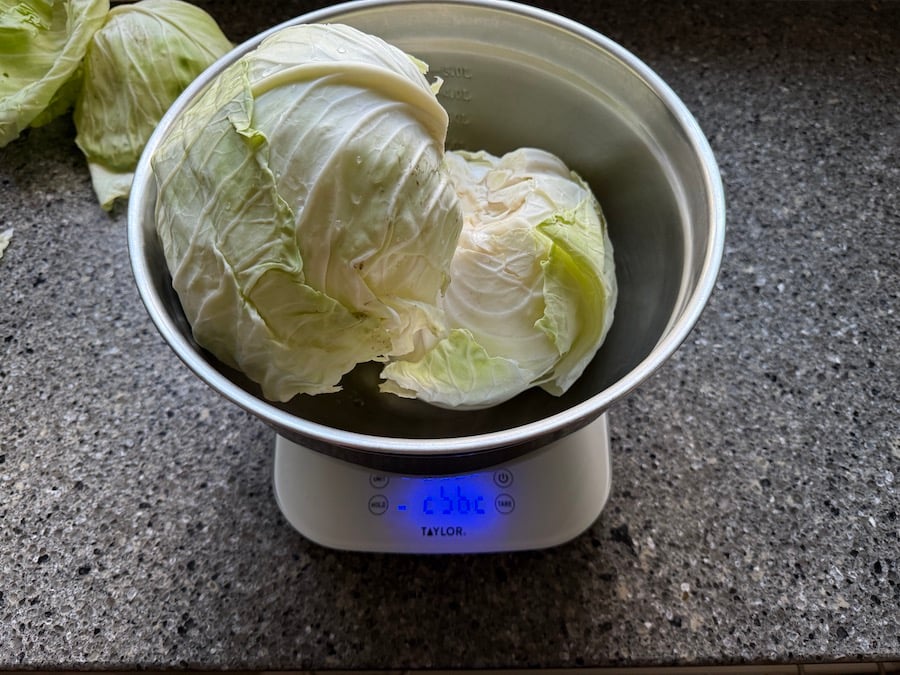
One of the key factors to making sauerkraut is figuring out the salt-to-cabbage ratio. You will need 1 tablespoon of salt for every 800 grams of cabbage. If the weight of your cabbage falls somewhere in between, always round up on the salt. So, for example, my two heads of cabbage weighed 2,983 grams. I had to quadruple the salt to ensure I had a sufficient amount (800g x 4= 3,200 grams).
The salt helps the cabbage release its natural juices when massaged and then preserves the cabbage. The rest is easy; chop, salt, and rub the cabbage until the juices release, then pack everything into jars.
How To Make Sauerkraut that Works:
- Trim the cabbage core and discard any damaged outer leaves. Weigh the cabbage. Then calculate how much salt you need (1 Tbsp salt per 800 grams of cabbage with the core and outer leaves removed).
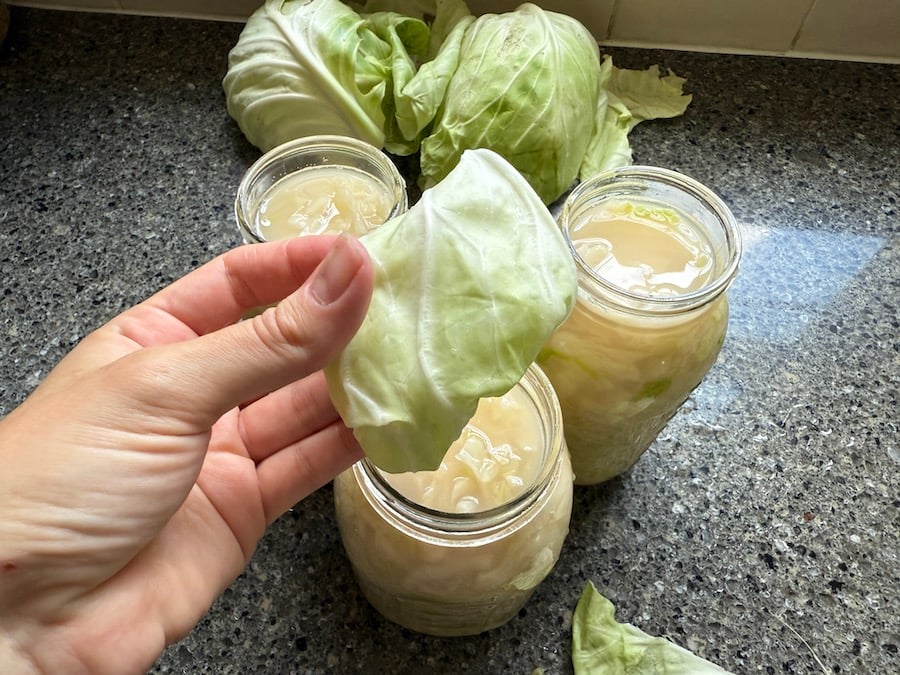
Wash the cabbage heads and remove any outer layers that have holes or are spotted. Save a few leaves to use as a weight to keep the cabbage under the brine.

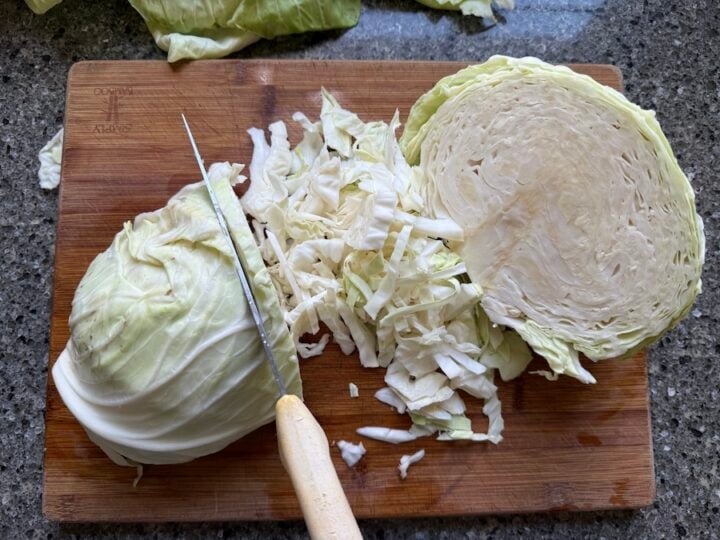
Cut the cabbage in half for easier handling, and then chop the cabbage. I like it more coarse and chunky when cutting because after fermentation, the leaves shrink and remain crunchy this way.
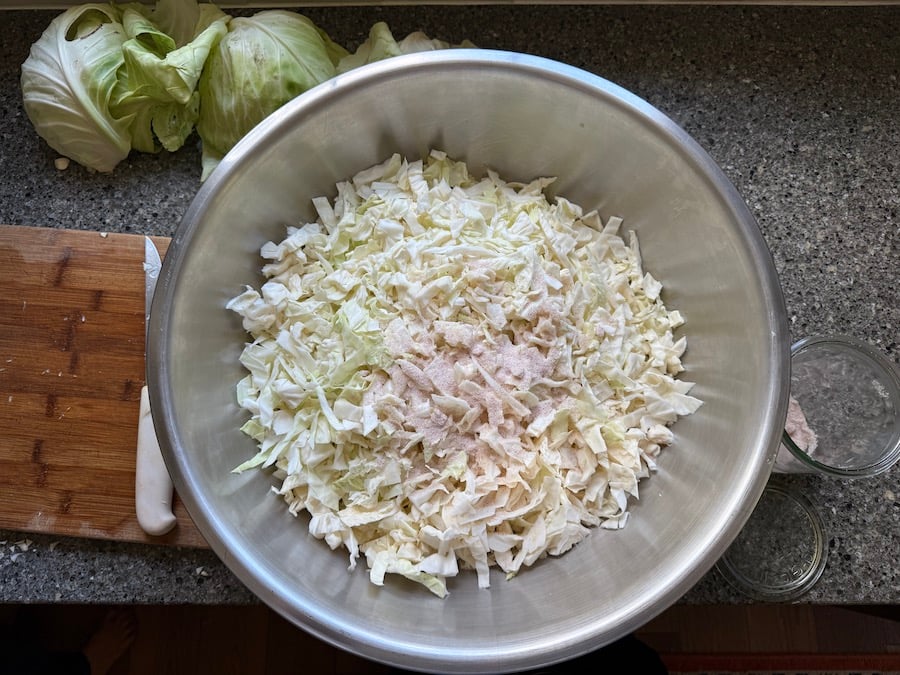
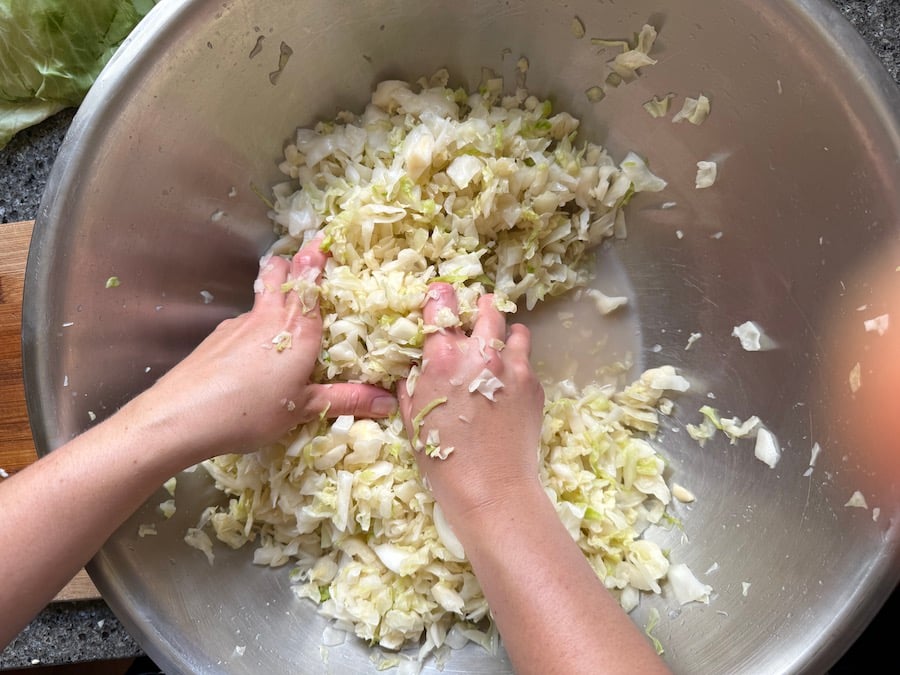
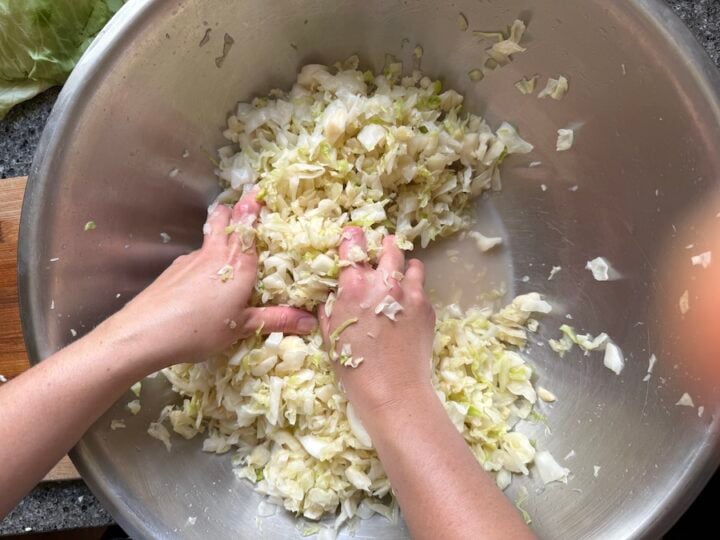
Place the chopped cabbage into an extra-large mixing bowl and sprinkle with salt. I used 4 Tbsp of salt for my two heads of cabbage.
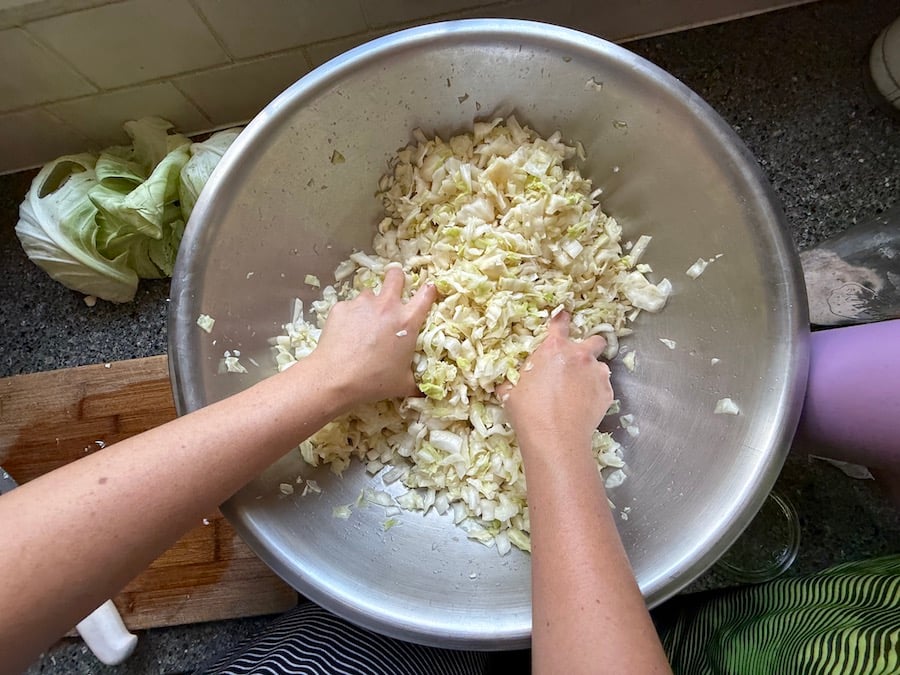
Massage the salt into the cabbage for 13-15 minutes until there is liquid on the bottom of your bowl, and when you squeeze the cabbage liquid releases.
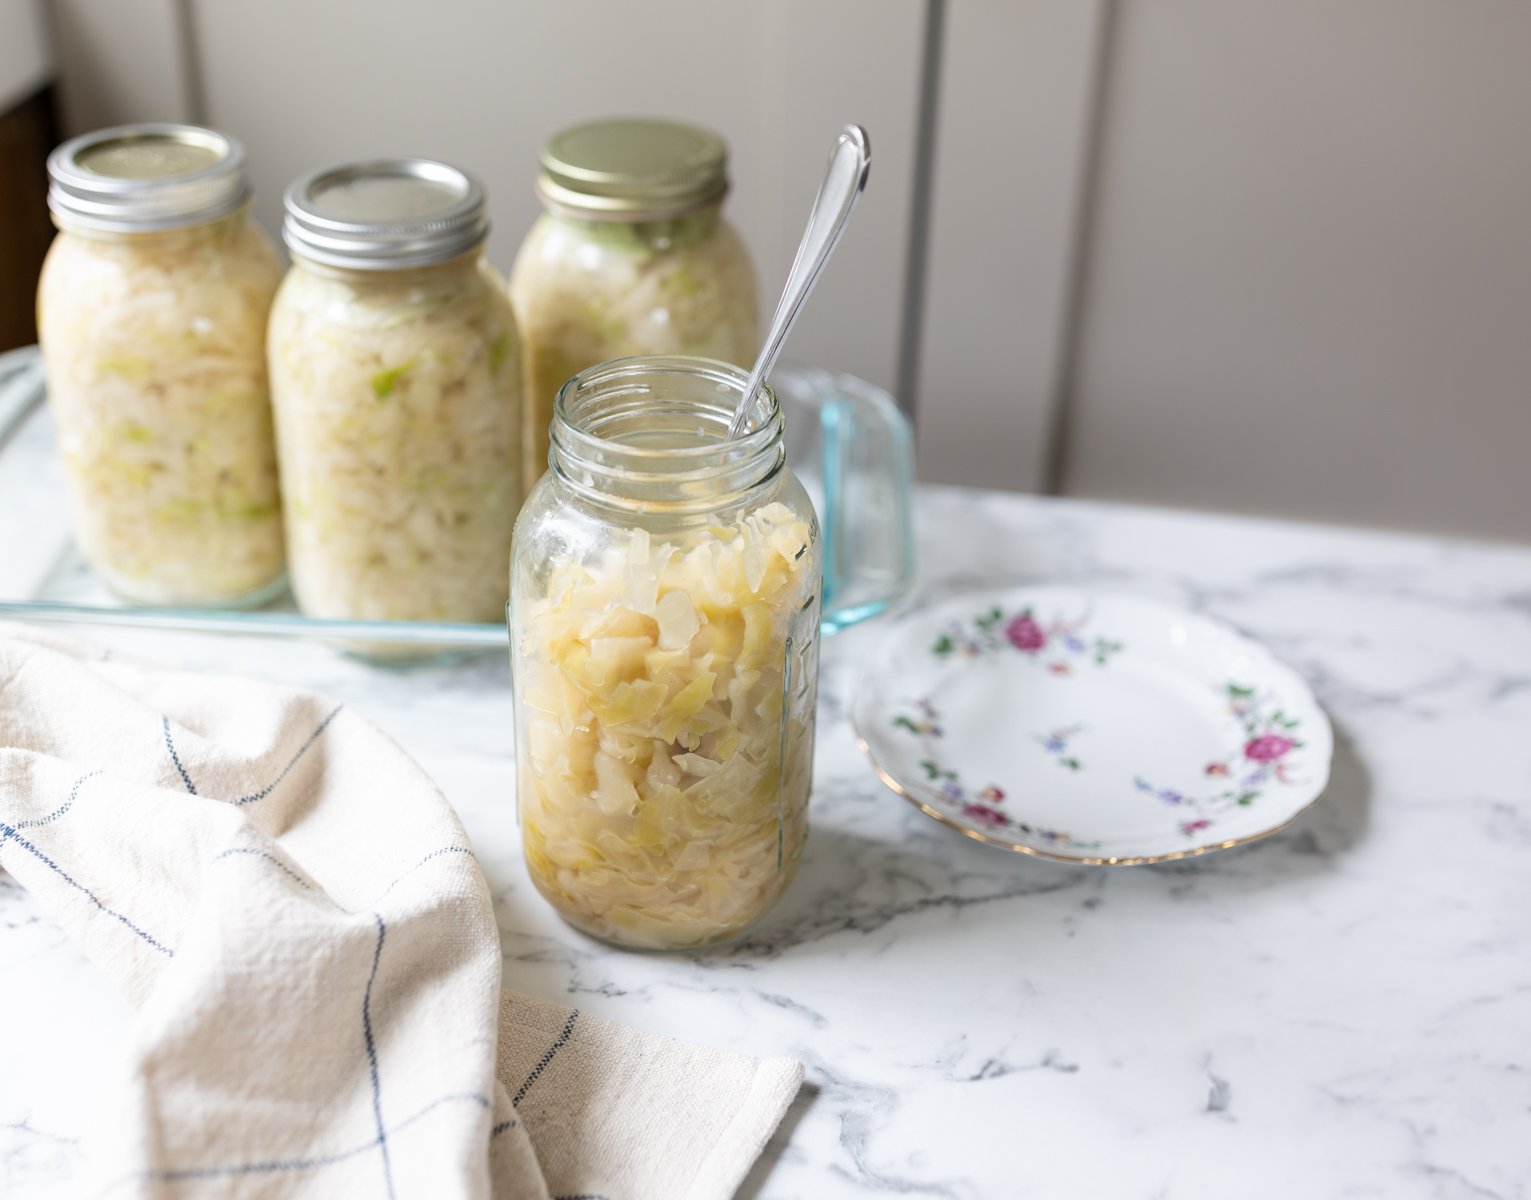
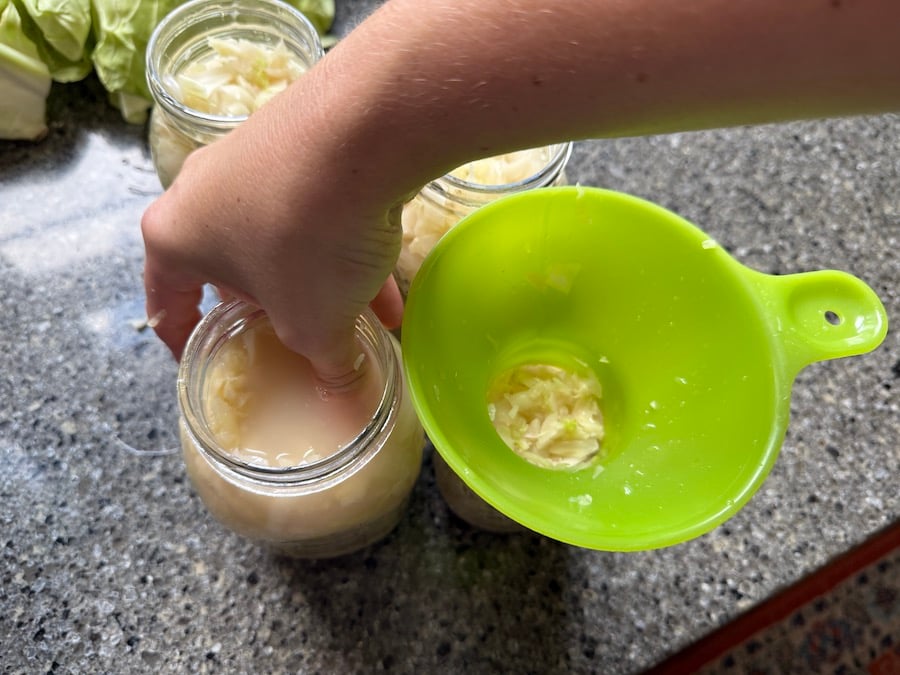
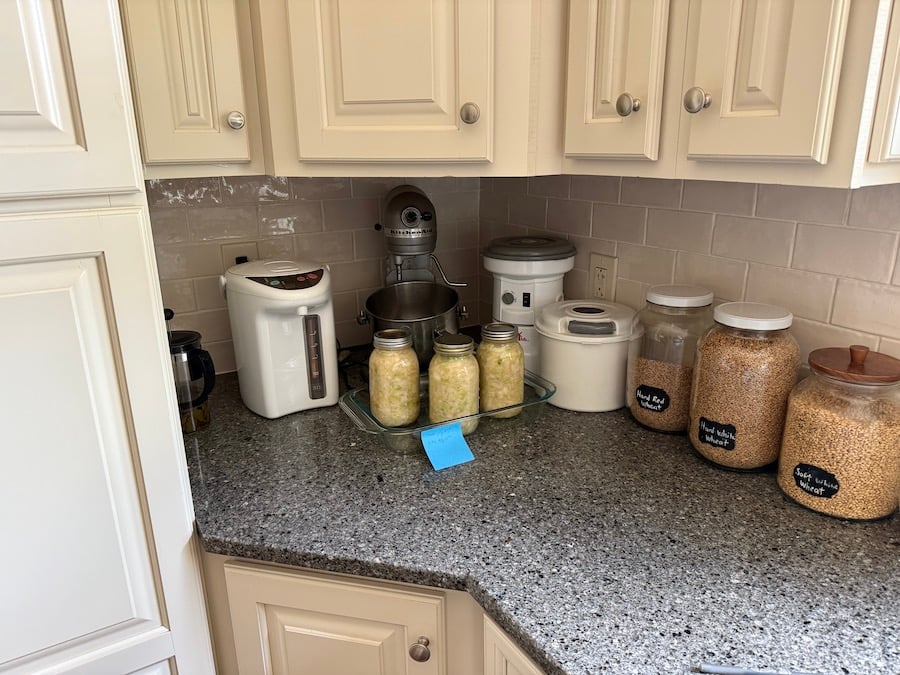
Tightly pack the cabbage into 3 or 4 quart jars until the liquid covers the cabbage. Pour any excess liquid from the bowl over the top.
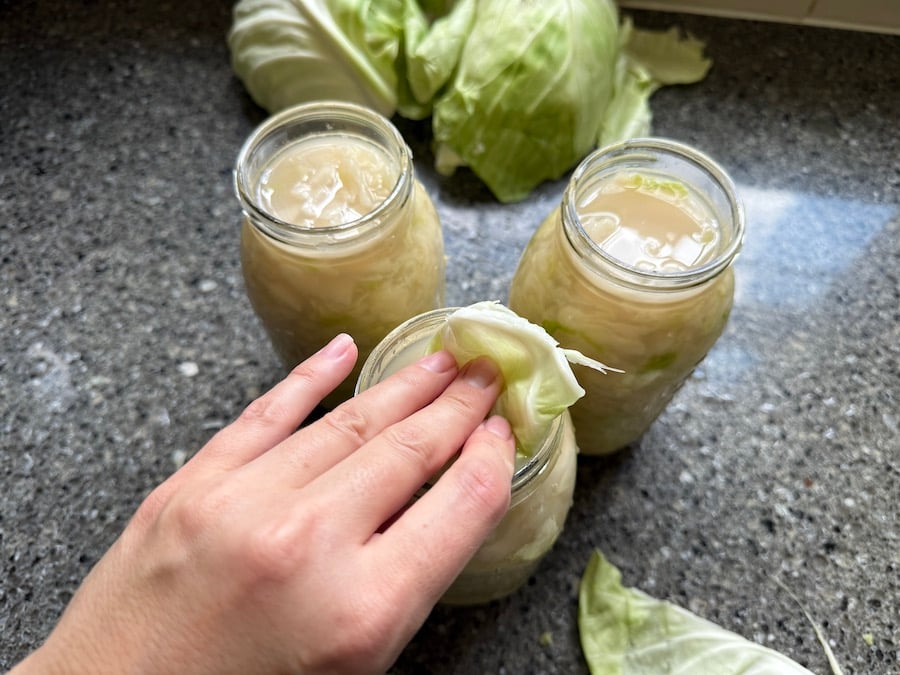
Fold a leaf of cabbage into thirds and weigh the cabbage down with it, making sure the liquid stays over the cabbage.
Cover the jars with regular canning lids and shut finger-tight. Place the jars over a glass Pyrex dish to catch any liquid that weeps out during fermentation. Allow the jars to sit on the counter in a dark corner for 1-2 weeks. I do it for two weeks.
After two weeks, wipe the jars and store in a dark, cool place for 3-4 months (mine keep for way longer).

Pro-Tip: Make a note on a sticky for the date you started the batch of sauerkraut and the day you need to put it away for longer storage (preferably two weeks later).
Additional Resources:
Nourishing Traditions is the ultimate guide to fermenting, making homemade broths, sourdough, and so much more! It’s such a good read for someone on a journey to healthier eating habits and has a wealth of information as well as recipes. I highly recommend investing in a book that tells you the why behind it and guides you to simple eating.
Can You Freeze Sauerkraut?
I don’t recommend freezing raw fermented saurkraut. It will kill off any good bacteria and probiotics that have developed through fermentation. Naturally fermented sauerkraut keeps for a very long time, so if you are unsure about it, just keep it in the fridge to enjoy all the advantages of fermented foods.
How Long Does it Take to Ferment?
Homemade sauerkraut made with just salt should be fermented for at least two weeks. After two weeks, the sauerkraut should have released its juices and will likely not weep out liquid anymore. This is the time to wipe the jars and place them in a cold environment for longer storage. It will still ferment as it ages. The ideal temperature for fermentation is around 70°F (21°C).
Does Sauerkraut Go Bad?
I have never had this sauerkraut recipe go bad on me. My Mennonite friend who shared the recipe said she had one jar that didn’t seal right and went bad. I love this recipe for sauerkraut so much, I really believe that it works. If in some cases you see mold, or it smells or tastes off, toss it. Homemade sauerkraut should smell tangy, sour, and pickle-like. It should give you an appetite.
More Fermented Foods To Explore:


This sauerkraut recipe is a keeper and turns out all the time for me! I would love to know what you think down in the comments below!
Join My Weekly Newsletter
New recipes, homesteading, family life, what we eat in a week, and hospitality tips.
Pin this now to find it later
How To Make Sauerkraut
Equipment
- 1 Extra Large Mixing Bowl
- 3-4 Regular mouth canning jars, bands, and lids
- 1 Pyrex glass dish, (or any dish to contain any liquid that weeps out).
- 1 funnel
Ingredients
Ingredients:
- 1 Tbsp salt for every 800 grams of cabbage , (about 2 Tbsp salt for every head of cabbage)
- Fresh Green Cabbage, (Any winter variety with dense, tightly packed leaves. The whiter the cabbage and the more tightly packed it is, the more brine it will produce). I used homegrown stonehead cabbage.
Instructions
Instructions:
- Trim off the cabbage core and remove any outer leaves that have bruises or spotting. Reserve a few cabbage leaves for weighing down the sauerkraut later.

- Weigh the trimmed cabbage. For every 800 grams of cabbage, add 1 Tablespoon salt.
- Slice the cabbage in 1/4-1/2-thick pieces. I like to chop it by hand on the thicker side so that the saurkraut stays crunchy after fermentation. If you prefer finer saurkraut, use a Mandoline.
- Transfer the chopped cabbage into an extra-large mixing bowl and sprinkle in the salt. Massage the salt into the cabbage with your hands for 13-15 minutes, until the liquid releases at the bottom of the bowl.
- Tightly pack the cabbage into quart-sized mason jars as tightly as possible. This will also help the liquid come to the top. Pour any excess juices from the bowl over the packed cabbage. Fold over a reserved cabbage leaf and weigh down the cabbage with it.
- Shut the jars finger-tight with regular canning lids and bands. Place onto a Pyrex dish to catch any liquid that seeps out. Allow it to ferment for two weeks. After that, wipe the jars and transfer to a cool, dark place for longer storage. Homemade sauerkraut can keep well over 8 months.


Notes
- For crunchy sauerkraut, chop it thicker.
- Use a good-quality sea salt or kosher salt for proper fermentation to happen. I don't recommend iodized salt.
- I used homegrown Stonehead Cabbage that we grew in zone 8.
- Make a note on a sticky for the date you started the batch of sauerkraut and the day you need to put it away for longer storage (preferably two weeks later).
- Use smaller quart-sized jars for making homemade sauerkraut; this way, you can go through it quicker and avoid waste. I also like the narrower regular mouth canning jars, as they help the liquid stay down better than a wide-mouth jar.
- If you don't have fermenting weights, use a cabbage leaf to weigh down the sauerkraut.
- It is not essential to own special equipment for making homemade sauerkraut; folks of past generations used basic tools to make it.
- I store my homemade sauerkraut on the shelf with my canned foods (in a dark, cool area). My friend keeps it in the basement for long-term storage. However, once opened, you should refrigerate it.
- Discard the leaf when opening. Opened sauerkraut will last for months in the fridge.
Nutrition (per serving)
Tried this recipe?
Mention @alyonascooking or hashtag #alyonascooking.