These oven-baked chicken drumsticks make the easiest dinner with minimal effort! It was a meal my mother-in-law introduced to me when she lived with us. Drumsticks are a cheap protein, incredibly delicious, and kid-friendly! Simply, smear with mayo, season, and bake!
This post may contain affiliate links. Read our full disclosure.
Not only can you get a delicious meal from these drumsticks, but you can collect the bones to make a nourishing chicken broth in the Instant Pot afterwards!
When my mother-in-law lived with us, she’d take her turn to cook dinner. She cooks very simple recipes (raised 8 of her own children), and her food is so delicious!
One day, she made up the recipe for these baked chicken legs. The house smelled amazing, and it was a total hit with everyone, including children!
I jot down the recipe based on how she prepared them and decided it was time to share them on my blog (years later).
These are exactly how I would envision juicy baked chicken drumsticks. Tossed in something that requires hardly any mental effort. Crispy skins from the mayo coating. Minimal clean up. Scrumptious and easy.
That’s my kind of dinner.
In fact, if you have any bone-in poultry cuts, you can totally attempt this recipe. Just double the coating for a whole chicken or leg quarters and increase the cooking time.
I love this chicken recipe! It’s so simple and tasty! If you give it a try, let me know how they turned out for you in the comments below.
From-Scratch Hack
Because this recipe calls for some staple condiments, I make sure I always have homemade mayonnaise on hand with this fail-proof recipe!
How To Make Chicken Drumsticks
I’m going to show you how to make baked chicken drumsticks step-by-step (see recipe card). Gather your ingredients, and let’s walk through the process.
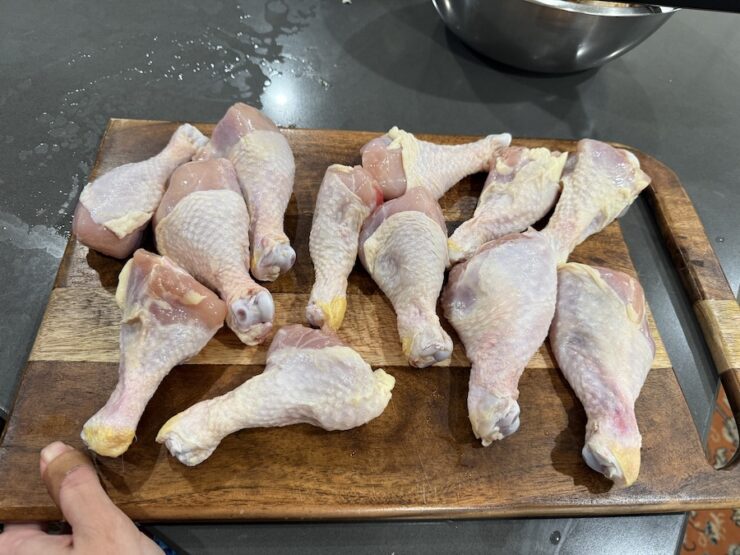
The first step is to wash the drumsticks under cold water. Pluck out any feathers and place them on a rack to air dry while you gather the ingredients.
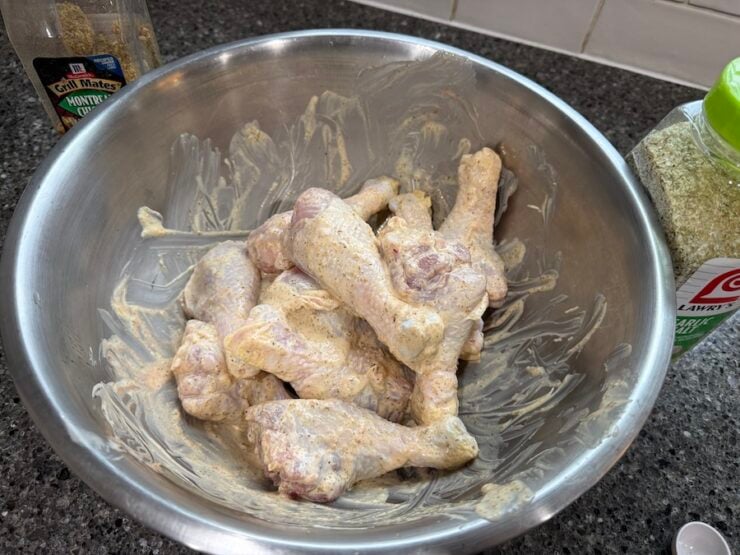
In a large mixing bowl, combine the spice mix with the mayonnaise and hot sauce. No particular order, just dump everything together.
Add the drumsticks. Toss everything together to evenly coat the chicken. They should look well seasoned and moistened from the creamy coating. Everything should be evenly coated.
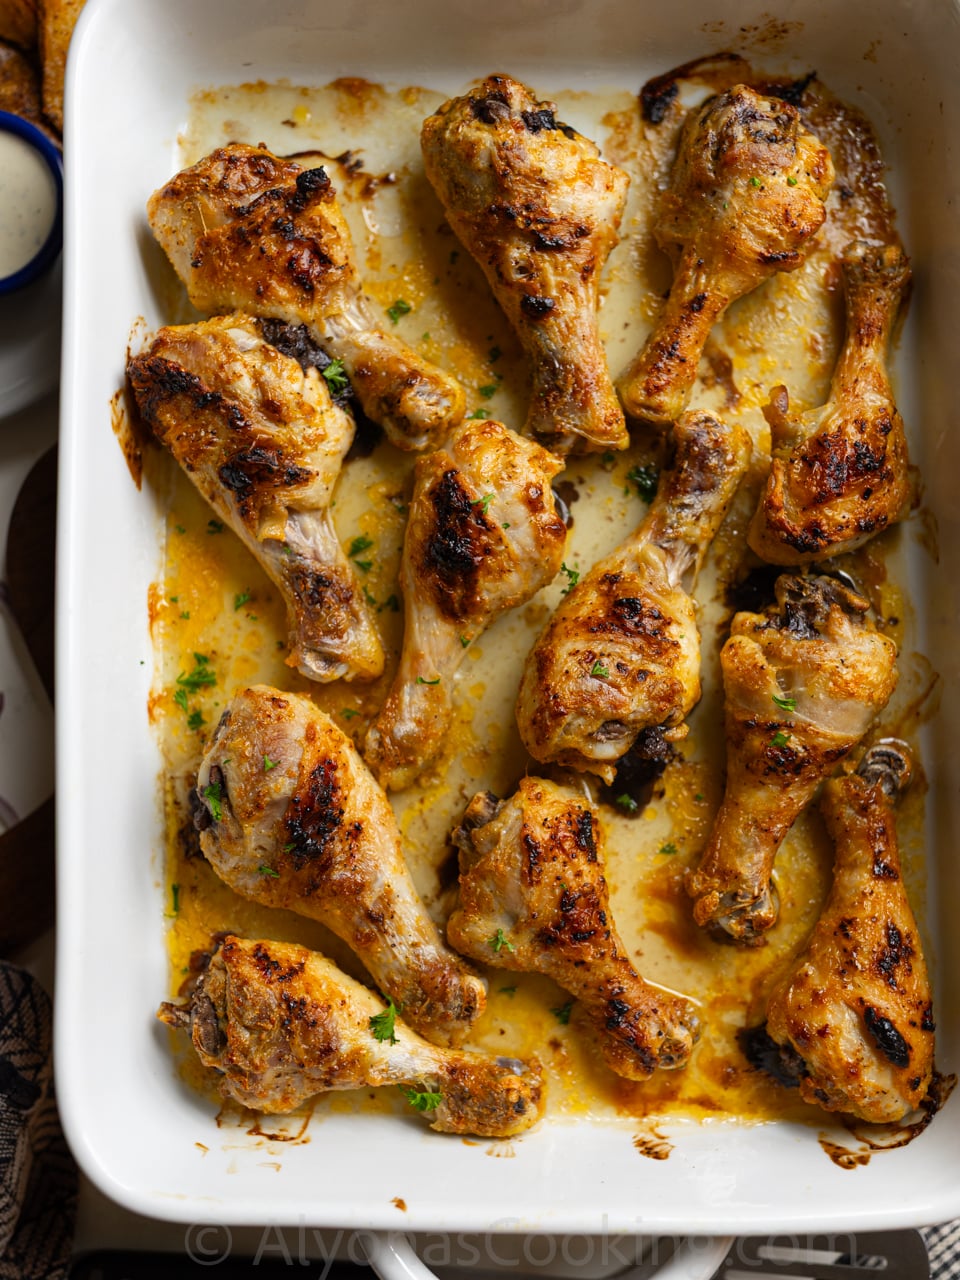
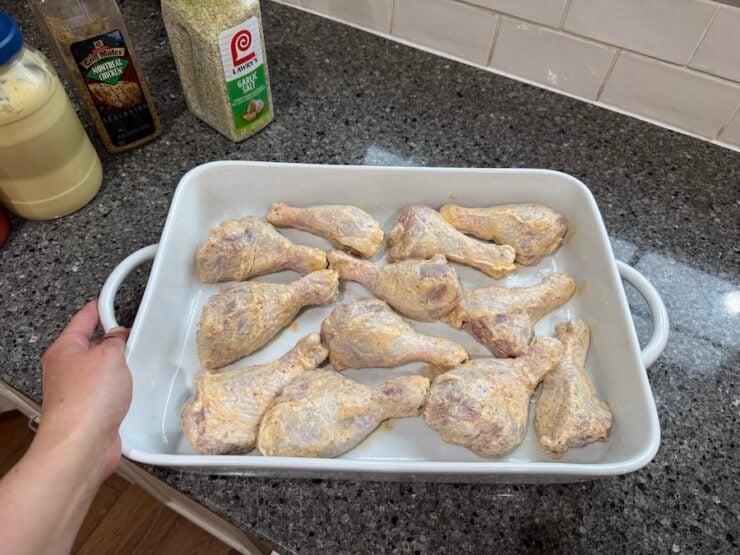
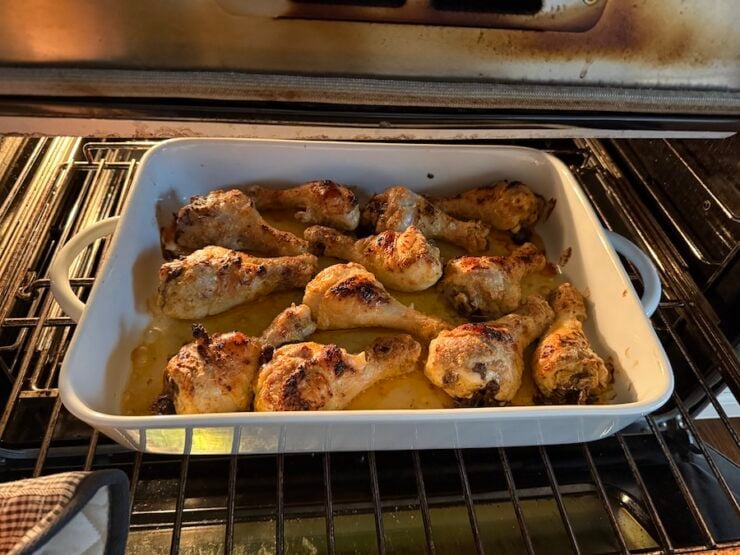
Evenly arrange the drumsticks onto a large baking dish (15×10) or a rimmed sheet pan (to catch any juices). You could line the pan with parchment paper for easier clean up, but I sprayed my baking dish with avocado oil cooking spray.
Bake the chicken drumsticks in a preheated 400°F oven for about 45 minutes. Ideally, the internal temperature should be 165° to 175°F for more tender and juicy drumsticks.
Serve warm, with a side of potatoes and steamed veggies! My mother-in-law served them gluten-free with a creamy cauliflower salad.
Note: these chicken drumsticks are not spicy. The hot sauce amount makes it very mild and mainly adds more flavor from the vinegary cayenne sauce.
Mise en PlaceEverything You Need! :
Equipment:
18×13 rimmed baking sheet
Parchment paper (for easier clean up) or avocado oil cooking spray
Large mixing bowl
Set of measuring spoons and cups
The Best Chicken Drumsticks Recipe: (Ingredients & Substitutes)
A family pack of chicken drumsticks is about 4.5 pounds of meat. This recipe feeds a crowd of 8 or so people. Scale down the recipe if needed.
Seasonings- the spices here are very few but highly delicious! I only use Montreal chicken seasoning and garlic salt. If you don’t have the spice mixes, you season the meat with a generous amount of salt and pepper, paprika, onion powder, garlic powder, Italian seasoning, and a dash of cayenne pepper.
Mayonnaise- can be interchangeable with creamy ranch dressing or Caesar’s. You do not need oil for this recipe; mayo is already an oil-based dressing. I use my homemade mayonnaise recipe.
Hot sauce is used in a small amount to add a little more depth of flavor without intensity. This amount is very small, but it enhances the flavor so much! I wouldn’t skip it.
My Tips & Suggestions:
I like to use a large baking dish so that I can serve it right in the dish and not transfer anything.
Use your favorite meat or poultry seasoning blend. Dried garlic and salt add lots of savory flavor.
I own a meat thermometer that I’ve used more times than I can count! It’s so handy to read the internal temperature of the meat in order to find out if it’s fully cooked. Ideally, chicken is fully cooked when it registers 165°F, but bone-in cuts are more tender, registering at 175°F.
Avoid over-baking the chicken drumsticks. Nobody likes rubbery or dry meat. Check the meat at the 40-minute mark and check every few minutes because the internal temperature can rise rapidly. So watch it carefully towards the end.
Space drumsticks about 1 to 2 inches apart so they roast properly and so that the skins get crispy. I don’t bother to flip them through halfway through, but you can if you wish.
Double the coating mixture for any poultry weighing over 4 pounds.
I recommend a bone-in cut with skins on to lock in the moisture and juiciness of the meat. Boneless cuts can be used; however, the baking time will need to be adjusted for lesser time.
For more tender drumsticks, bake them covered for the first 30 minutes. Then uncover and bake on high for the last 15 minutes of baking.
From-Scratch Chicken Broth Using Leftovers
I like to take leftover chicken bones from a whole chicken, or in this case, drumsticks, and repurpose the bones for a delicious broth in soups later on in the week.
To do this, collect the bones and wash them under hot water. Add them to an instant pot with 1 carrot, 1 stalk of celery, 1/2 large onion, a pinch of peppercorns, two splashes of apple cider vinegar, and 1 Tbsp salt. Cover the bones with enough water to come up to the max line. Add a couple of chicken feet if you have them for extra collagen. Pressure cook on high for 4 hours. Then let it naturally release and cool. Strain and keep stored in the fridge in mason jars.
Use for soups throughout the week!
What To Serve With Chicken Drumsticks:
My mother-in-law originally served these with a cauliflower salad. However, potatoes (roasted or mashed), rice, buckwheat, or plain buttered pasta make outstanding sides! I prefer to make baked chicken drumsticks with roasted potatoes and a simple side salad or steamed veggies. Our favorite dipping sauce for drumsticks is homemade ketchup!
Storing & Reheating
I don’t own a microwave anymore; we reheat things the old-fashioned way with optimal results!
Leftovers should be stored in the fridge in an airtight container (or placed in a dish and wrapped with plastic wrap). Keep refrigerated up to 4 days.
To reheat, pour 1/2 cup of water into the bottom of a 9×13 pan. Arrange chicken drumsticks over the top and cover with foil. Bake in a preheated 350°F oven for 15-20 minutes or until heated through. Then uncover and broil over high until crispy (1-2 minutes).
Alternatively, you can do this in a deep skillet over medium-low heat for a fraction of the time. Then uncover and crisp them up.
Join My Weekly Newsletter
New recipes, homesteading, family life, what we eat in a week, and hospitality tips.
Thank you! Please check your email to confirm your subscription.
These oven-baked chicken drumsticks make the easiest dinner with minimal effort! It was a meal my mother-in-law introduced me to when she lived with us. Drumsticks are a cheap protein, incredibly delicious, and kid-friendly! Simply, smear with mayo, season, and bake!
Wash and pat dry the chicken drumsticks. Preheat the oven to 400°F.
In a large mixing bowl, combine 12 drumsticks, 1/3 cup mayo, 1 Tbsp hot sauce, 1/2 Tbsp each of garlic salt, and Montreal Chicken Seasoning. Coat all the chicken pieces evenly.
Arrange all the chicken drumsticks in a greased large baking dish (about 15×10 or larger sheet pan).
Bake in the preheated 400°F oven for 30 minutes, uncovered. Then broil over high heat the last 10-15 minutes. Adjust the rack accordingly and keep an eye out. The internal meat temperature should read 165°F (or 175°F for more tender meat). Serve hot.