

This post may contain affiliate links. Read our full disclosure.
There are tons of cheesecake recipes out there! I personally love Chantel’s New York Cheesecake, recreated some of my own versions, and actually rank for this easy cheesecake recipe (reader favorite)!
Classic Cheesecake
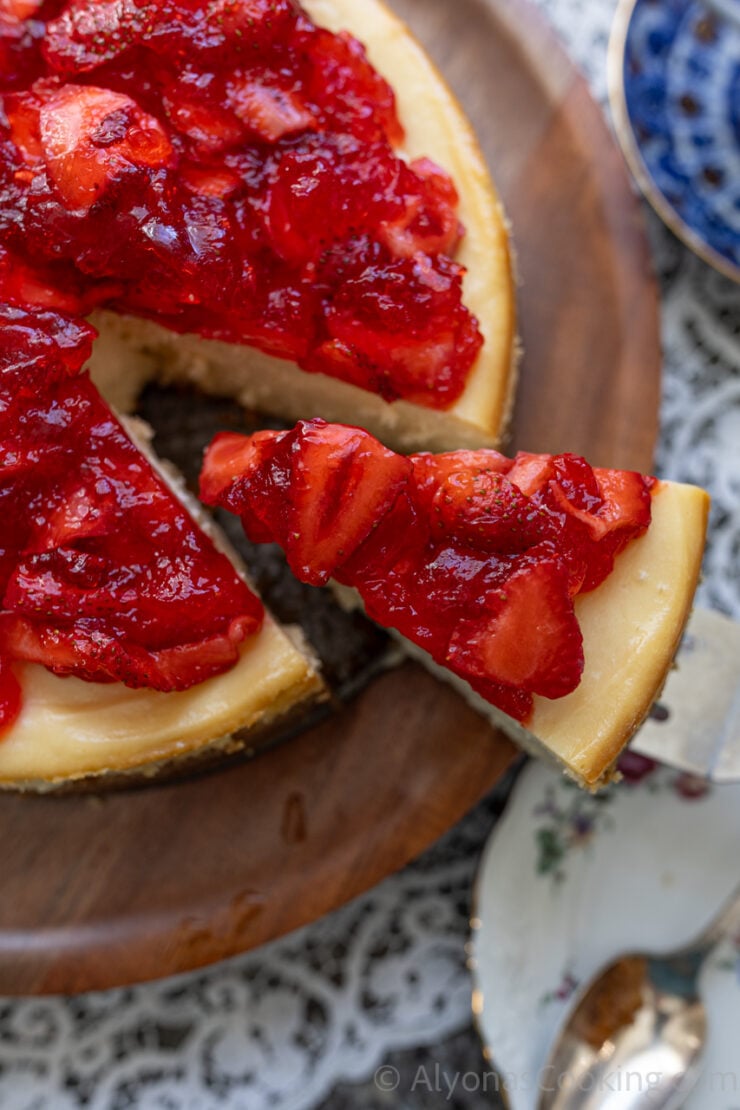
But this cheesecake recipe is amazing! It’s has all the flavors of a classic cheesecake recipe and it looks like it’s bought.
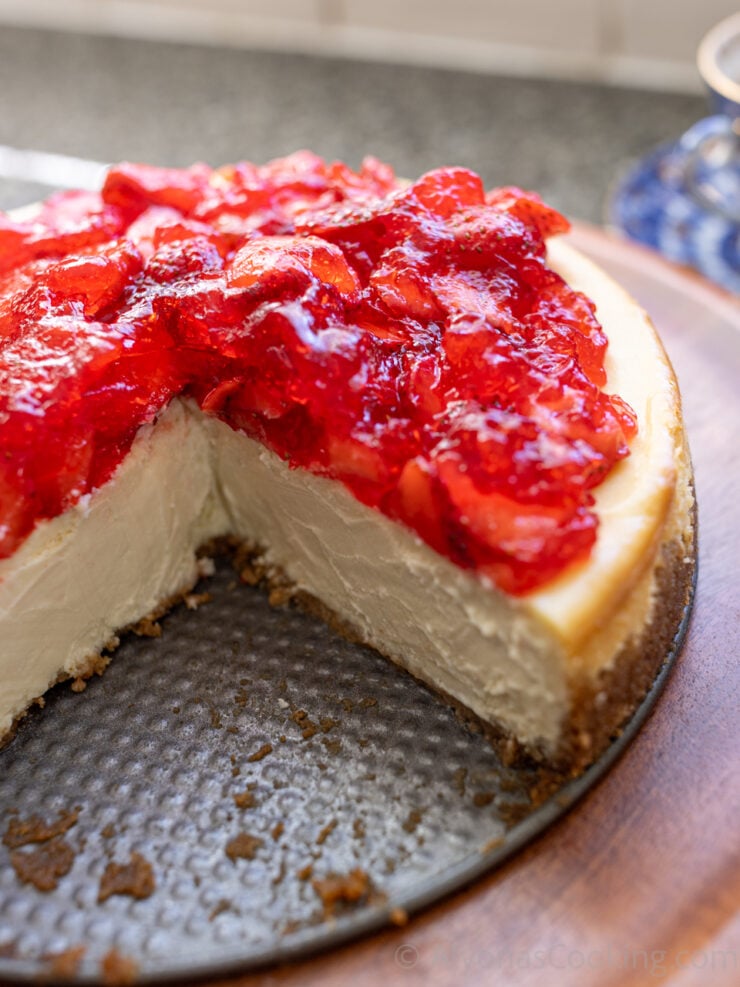
It comes together incredibly easy and is basically like a no-fail cheesecake recipe, really!
I got this recipe from my church group, where we got into the discussion of cheesecakes… Anyways one lady shared her husband’s side of the family cheesecake. I was told she was known for this cheesecake!
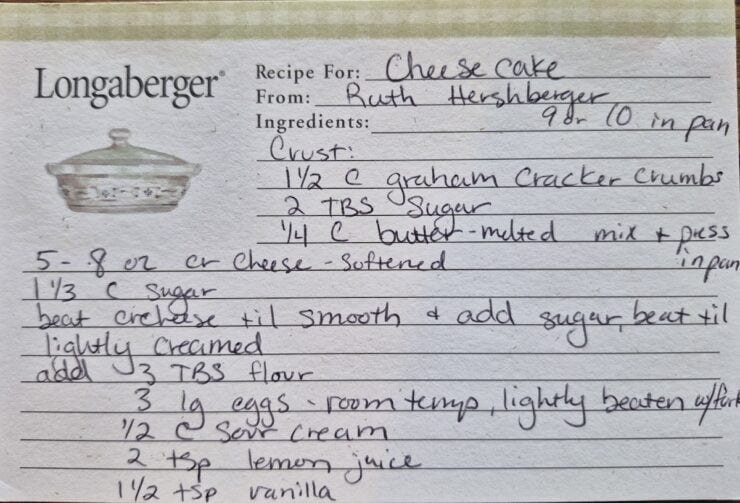
After observing the simple and few ingredients I decided to give it a go for upcoming visitors. It was incredibly easy to make (which is why I went for it after looking at it).
For a classic cheesecake and I was surprised it called for 5 packages of cream cheese rather than the normal four packs.
It turned out fabulous for the first try and it was served the next day.
Our guest kept commenting on how it was the best cheesecake she’s ever had. And upon seeing her in church the very next day she still commented about the cheesecake. So, I told her I might just have to post it on the blog… And here I am. ☺️
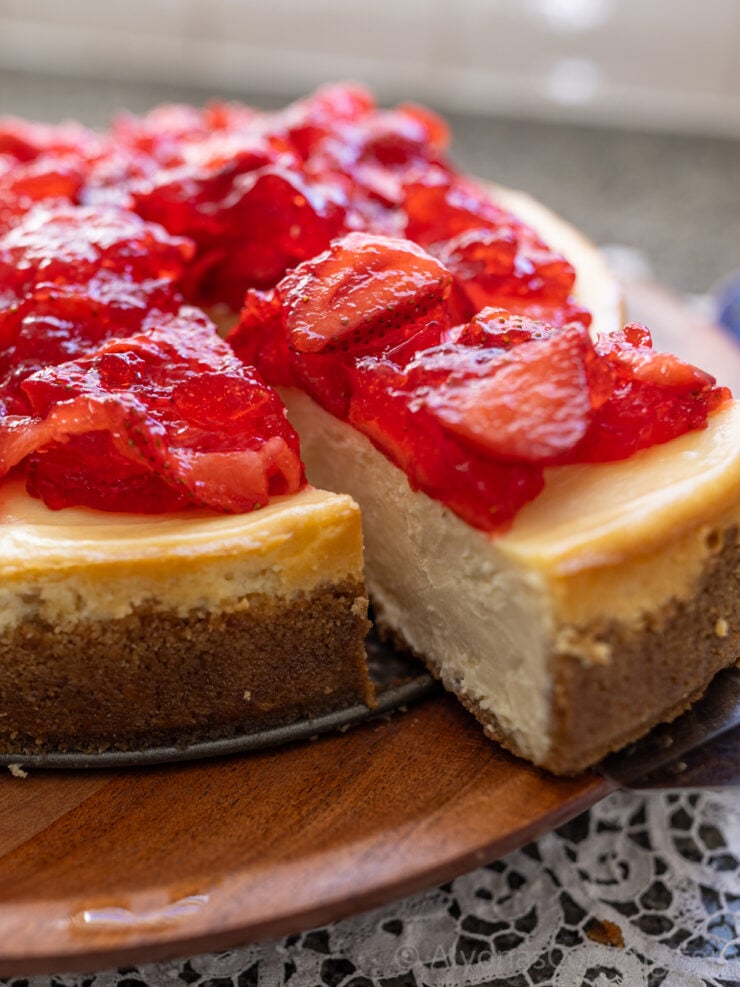
No-Fail
It turns out that this cheesecake turns out on the first try and seems to always work. I will include all my tips and the step-by-step visual instructions (they’re so easy)! So, that you can perfect this cheesecake right in your own home!
But this version is incredible! I usually make this cheesecake recipe when I’m going for the classic taste.
If you’re looking for a classic and simple recipe then this is it.
I could imagine all the versions you can create from this basic recipe.
Irresistible Strawberry Topping:
I catered some weddings with a friend and at one wedding we needed to glaze the top of homemade cheesecakes with this vibrant red, thick and glossy strawberry glaze.
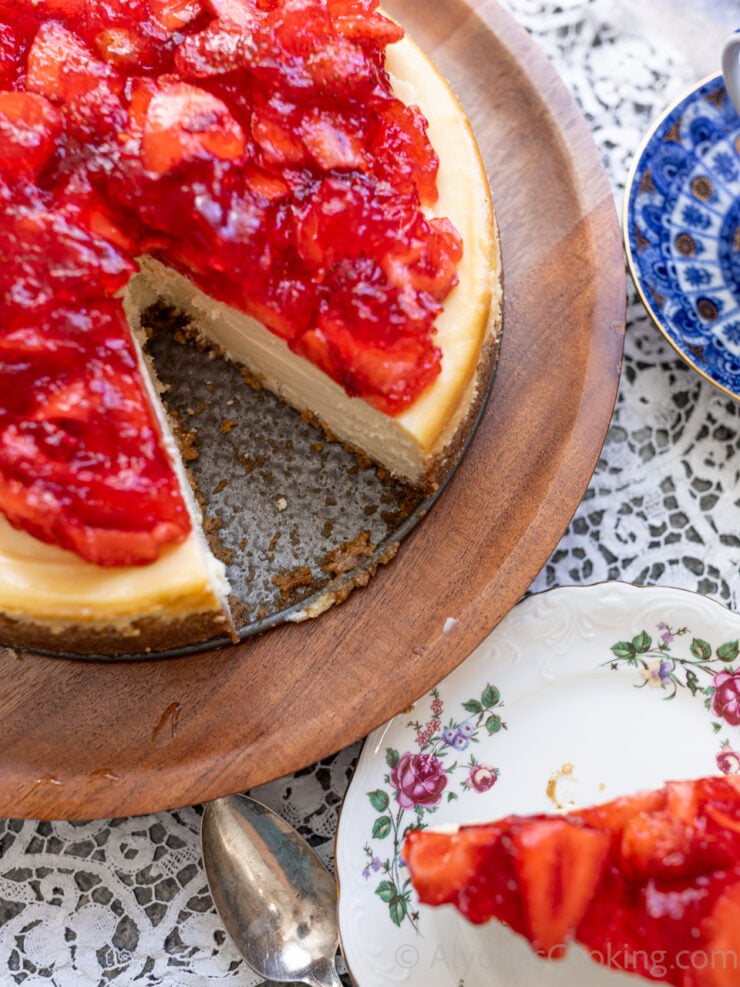
Well this strawberry topping is just like that glaze! It freezes well too! So, if you need to knock out a bigger batch and freeze the rest, you can! I tested freezing the glazed topping so, you can be rest assured it works.
The strawberry glazed topping calls for some Jell-o and I believe it helps the glaze stay vibrant and red. I only tested it with raspberry jello, but I’d think strawberry Jello would work the same.
I also believe the Jello in this pie filling helps keep the fruits fresh. It works sort of like a glaze would for a fruit pizza and from my experience makes the fruits look fresh for days (even after the freezer).
I have also used fresh and frozen strawberries for this strawberry pie filling topping. Thermflo can be purchased in most Amish bulk food stores and doesn’t leave any after-taste like cornstarch would.
Thermflo is a canning thickener and keeps things thick after canning or freezing. So, I highly recommend it. It makes the best glazes and sauces.
Mise en PlaceEverything You Need! :
Equipment that I used:
- 9 or 10″ springform pan ( I used 10-inch but for the taller cheesecake use the 9 inch.)
- Aluminum foil (to catch any grease from the crust)
- Hand mixer (I like to control the mixing so, not to over beat it).
- Rubber Spatula
- 9×9 pan to create steam and prevent cracks
Ingredients:
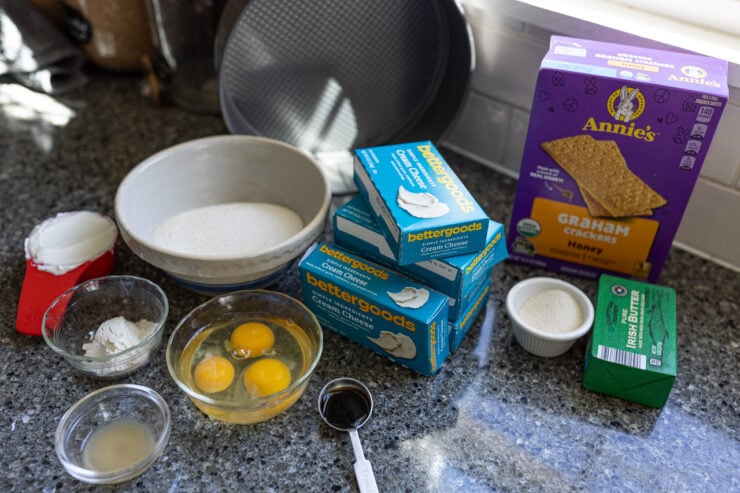
- Crust: 11/2 cups of graham crackers crumbs was exactly one sleeve of the organic graham crackers, I mentioned. Add 2 Tbsp of granulated sugar and 1/4 cup melted butter. Mix and press into the springform pan.
- Cheesecake filling: This recipe calls for 5 (8-oz) packages of cream cheese. I like to use Better Goods brand from Walmart. You’ll also need granulated sugar, all-purpose flour, eggs, sour cream, lemon juice, and vanilla extract.
My Top Cheesecake Tips That I’ve Learned Over the Last Decade
Use a Rolling Pin
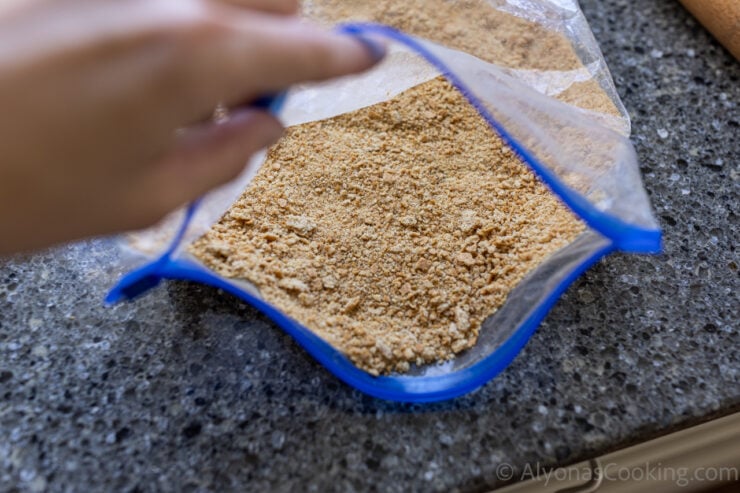
To make the graham cracker crumbs. I like to throw my graham crackers into a disposable gallon-sized freezer bag and run my rolling pin on top of it to make fine crumbs.
Leave bits and pieces for texture. Don’t crush it completely into fine flour.
Quick Room Temperature Cream Cheese Hack
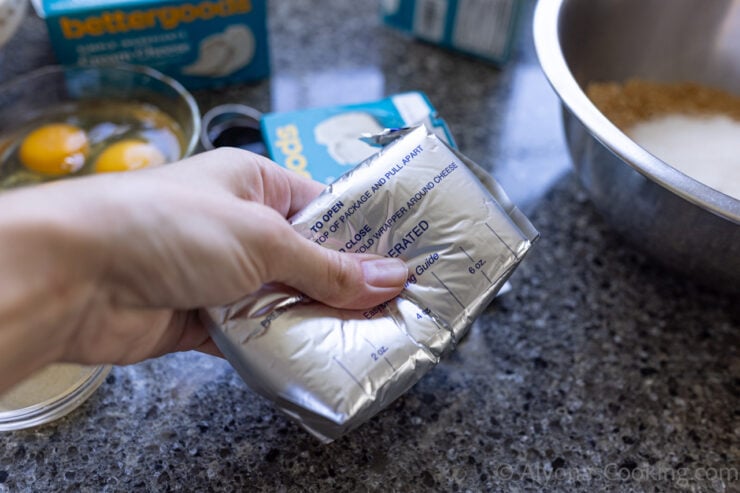
I hardly ever wait for my ingredients to reach room temperature. Maybe because I decide to bake cheesecake in the spur of the moment so, I do microwave the cream cheese until it’s soft (make sure you remove the foil wrapper).
A good rule of thumb is to microwave each package of cream cheese for 20-30 seconds. So, for example, if I need to heat up 5 packs of cream cheese on a dinner plate, I’d microwave it for 2 1/2 minutes.
If you don’t have a microwave, simply remove the cream cheese from the cardboard packaging and let it sit in its foiled packaging by a sunny window to soften. You’re left to wait on this one 😊 Give it a few hours.
Use Cream Cheese Blocks (not the Whipped Stuff)
There is a difference between a block of cream cheese and the whipped stuff in a tub. The whipped stuff is processed and will deflate when it gets hot. We are baking this cheesecake so, you need the heavy brick of real cream cheese.
Go Easy, Mix a Little After Each Ingredient
One of the worst things you can do with a cheesecake batter is to over beat it especially the cream cheese. I’ve done it before only to end up with a curdled and crumbly mess.
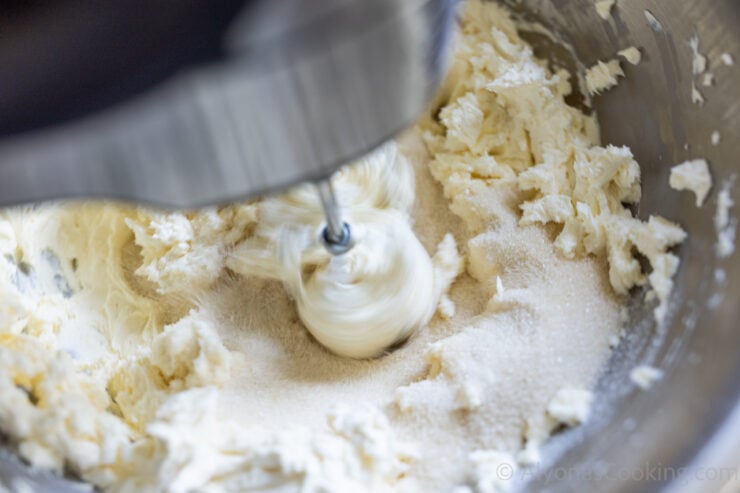
So, my top word of advice would be to mix as minimally as you can each step of the way. For example I try to beat the softened cream cheese for no longer than 30 seconds. And that applies to each add-in.
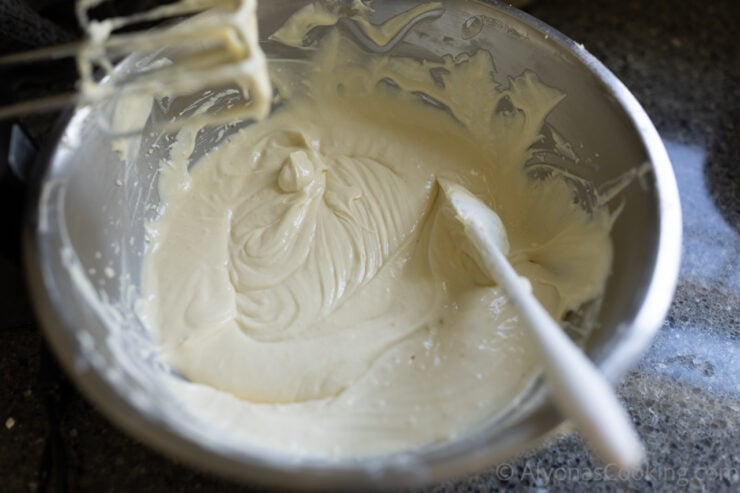
Also, make sure the cream cheese is at room temperature before you begin beating the cheesecake batter.
Only mix until the batter is just combined. If your batter is lumpy that’s a sign your cream cheese was not softened properly. Trying to solve it with a mixer may result in a crumbly cheesecake. I’d stop my mixer and let it soften a bit before finishing.
How Much is Enough Butter?
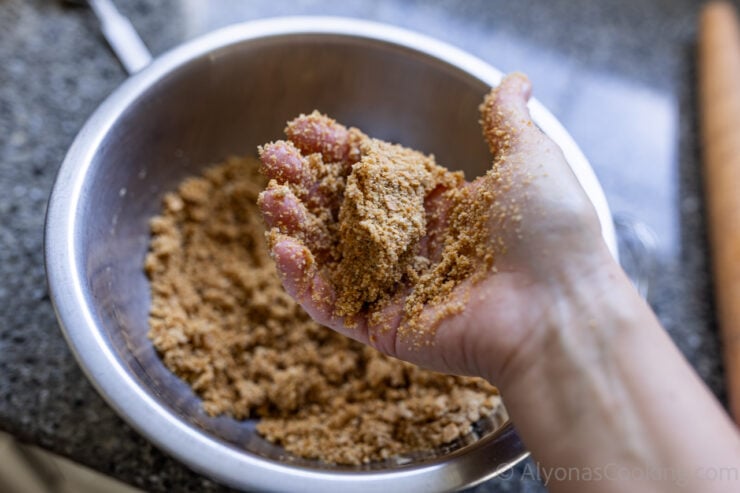
You might have been struggling with how much melted butter is needed to coat the graham crackers? This ratio-to-butter works perfectly (1.5 cups crumbs to 4 Tbsp butter)!
A good sign the crumb mixture is ready, is that the mixture clumps together when squeezed.
Wrap Bottom of Springform Pan with Foil
Wrap the bottom of your springform pan with foil to prevent any leaks that can come from the buttery crust.
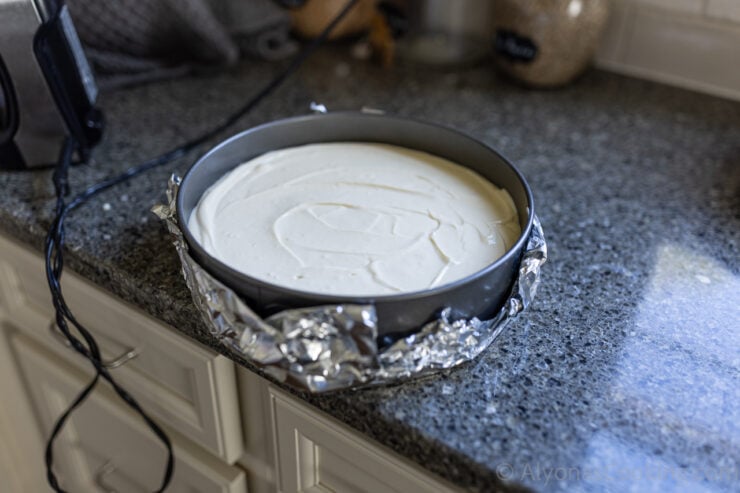
The first time I made this I had a puddle of grease to clean out on the bottom of my oven that leaked from the crust.
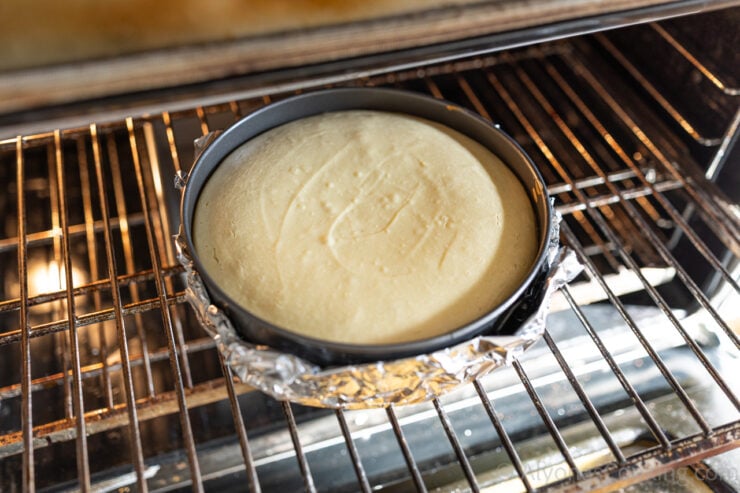
You can choose to water bath (by placing the lined pan into water) but I simply added a pan of water to the bottom rack of my oven and baked it over a low temperature to prevent cracks.
This works too, for minimal cracks.
Bake At a Low Temperature
And don’t open the oven door! I have an old Mennonite cookbook named “The Basics and More”. In this cookbook the basic cheesecake recipe calls for baking the cheesecake at 300°F for 75-80 minutes.
I’ve found this tip to be pretty accurate. Since I’ve used 5 blocks instead of four (mentioned in that recipe) I had to increase the bake time just by a little to get it just right.
To determine if the cheesecake is done, you want the edges to slightly puff up and the middle to be jiggly but not too wet and jiggly in the center, when determining if it’s done.
Perfect Crust
I like to the buy Annies Organic Graham Crackers (cleaner ingredients). I’ve found that 1 sleeve of these graham crackers works perfectly for this crust.
So, no unopened graham crackers laying around.
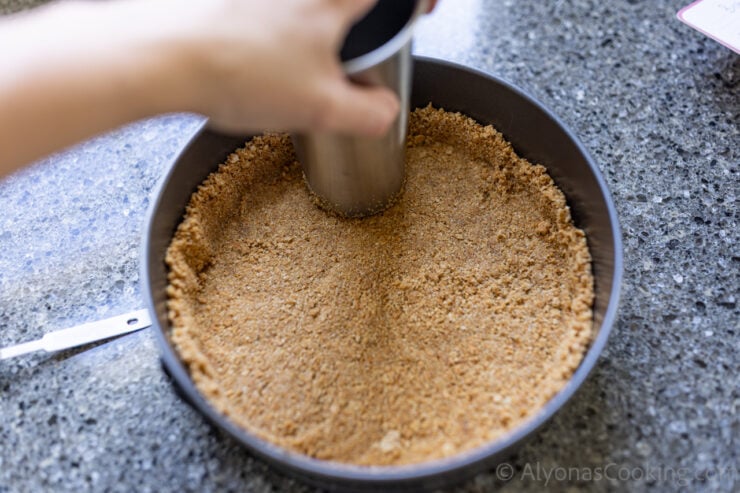
Pack and press the graham cracker mixture tightly into the springform pan going up on the sides. I like to use a stainless steel cup (it doesn’t stick as much).
Cool Cheesecake before Refrigerating
The original recipe called for baking this cheesecake for 2 hours over 225°F. Then cooling it turned off in the oven without opening it for several hours.
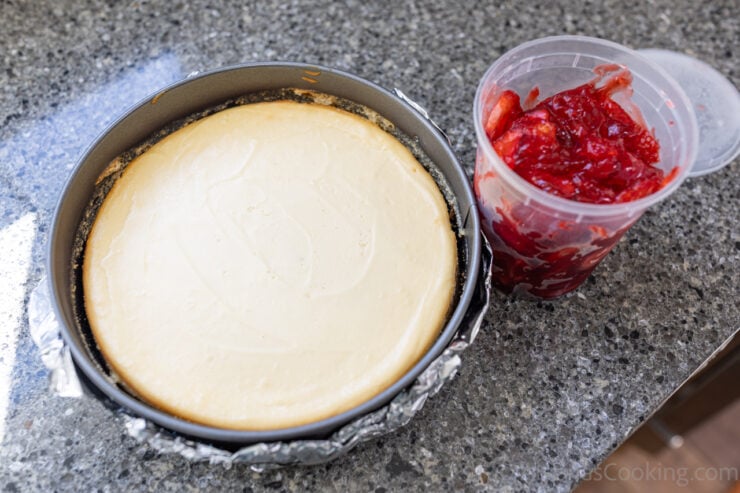
I worked around that to shorten the bake and cooling time by baking the cheesecake at 300°F for about 1 hour and 55 minutes. Cool the cheesecake in the oven for 10 minutes before removing.
My cheesecake usually hangs out on the counter for around an hour before I hide it in the fridge, overnight.
Since it’ll still be warm, I simply place a heat mat into the fridge then place the cheesecake over it.
The crust eventually loosens itself as it cools. Alternatively, you could run a knife around the edges to loosen, but I prefer the sides on so, the cheesecake doesn’t pick up the fridge odors.
The last time I made this cheesecake the sides shrank beautifully by themselves and I had no cracks.
Chill
Once the cheesecake has slightly cooled, chill overnight in the fridge. Try to refrigerate it for at least 8 hours in order to firm up.
Storing
My cheesecakes always chill in the fridge before and after serving. I’ll usually have it sit a few hours during serving time and it’ll go right back into the refrigerator.
After serving, I’ll usually store the cheesecake in the fridge without the ring sitting on a cake stand, and covered with plastic wrap.
Generally, you don’t want a cheesecake to be left out at room temperature for more than 2 hours but it’s a take or give depending on the temperature and the environment.
A cheesecake can keep up to a week in the fridge.
Can I Freeze?
Yes, cheesecake freezes very well. I’ve even froze the strawberry topping with fantastic results!
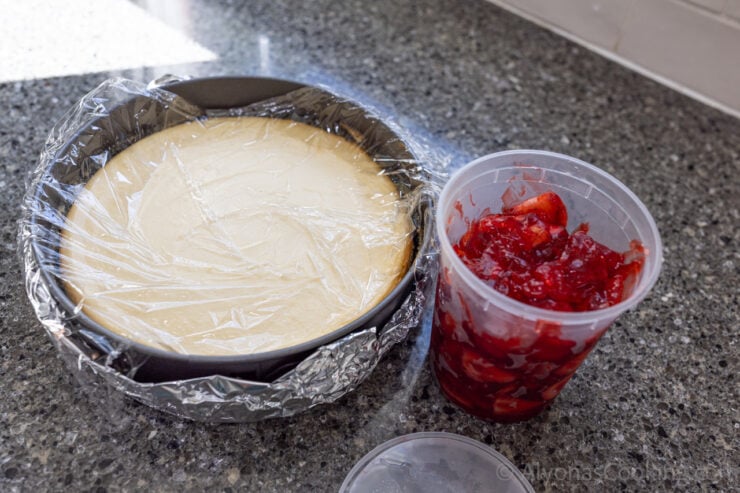
To freeze, you always want your cheesecake to cool. Preferably, to room temperature. If you can freeze the cheesecake and strawberry topping separately.
I like to flash freeze the cheesecake first. Then, you can double wrap it with plastic wrap and not smudge the cheesecake (cheesecake can cling to the wrap when it’s not frozen).
Cheesecake can keep frozen in a deep freezer for months. However, I’d try to use it up within 3 months for best flavor.
More Favorite Cheesecake Recipes:
We love cheesecakes at our house! They can satisfy the sweet tooth very well! For crowds, I like to bake them in lined, standard muffin pans for about 20 minutes. That way there’s no slicing involved!


More Tips:
- You do not need to grease the springform pan because the graham cracker crust has the butter in it and so, therefore won’t stick.
- To use a smaller springform use only part of the batter. A smaller 7-inch springform pan will hold up to 5 cups of batter and a larger one (9-inches) will hold up to 6 cups.
- You can use any excess batter for muffin-sized cheesecakes. Line a standard muffin pan and pour 2/3 full. Bake at 350°F for 15-20 minutes.
- If baking two or more cheesecakes at one time, you may need to increase the bake time.
- When making batter mix a little after each addition.
- To bake without a water bath, bake low and slow to prevent cracks. I like to set a pan half-full of water to create steam and prevent cracks from forming.
Join My Weekly Newsletter
New recipes, homesteading, family life, what we eat in a week, and hospitality tips.
Pin this now to find it later

The Best Cheesecake Recipe
Equipment
- 9 or 10-inch springform pan
- Aluminum foil, (for wrapping bottom and to prevent grease leakage)
Ingredients
Crust:
- 1 1/2 cups graham cracker crumbs
- 2 Tbsp granulated sugar
- 1/4 cup unsalted butter, (salted will add more flavor)
Cheesecake Filling:
- 5 (8-oz) packages cream cheese , softened
- 1 1/3 cup granulated sugar
- 3 Tbsp all-purpose flour
- 3 lrg eggs, room temperature
- 1/2 cup sour cream
- 2 tsp lemon juice
- 1 1/2 tsp vanilla extract
Strawberry Topping:
- 1 cup water
- 1/2 cup cane sugar
- 3 Tbsp raspberry jello , (or strawberry flavor)
- 2 Tbsp (heaping) Thermflo
- 1 lb fresh strawberries, (or frozen, partially thawed and sliced)
Instructions
- Melt the butter and mix with the graham cracker crumbs with 2 Tbsp sugar. Press into springform pan.

- Beat the cream cheese until smooth. Add 1 1/3 cups sugar and beat until lightly creamed.
- Then add 3 Tbsp flour, 3 eggs (slightly beaten with fork), 1/2 cup sour cream, 2 tsp lemon juice, and 1 1/2 tsp vanilla extract. Mix a little after each addition.
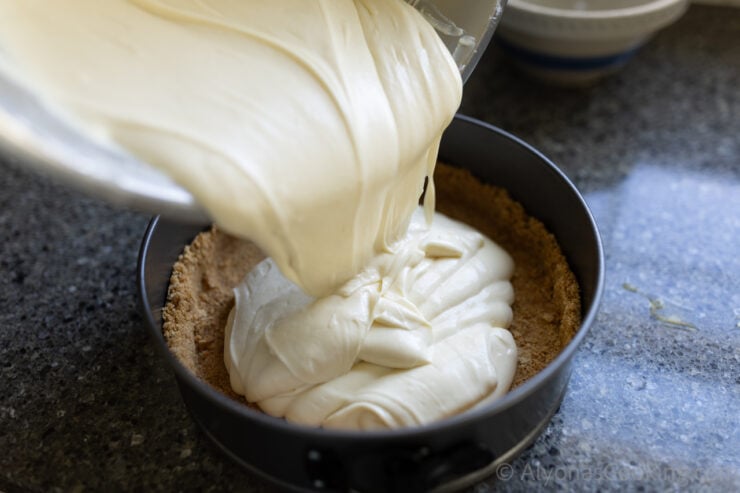
- Pour into crust.
- Bake at 300°F for 1 hour and 55 minutes. Turn off and leave in the oven with the door cracked open for 10 minutes then remove and cool. Chill for 8 hours in the fridge or overnight.
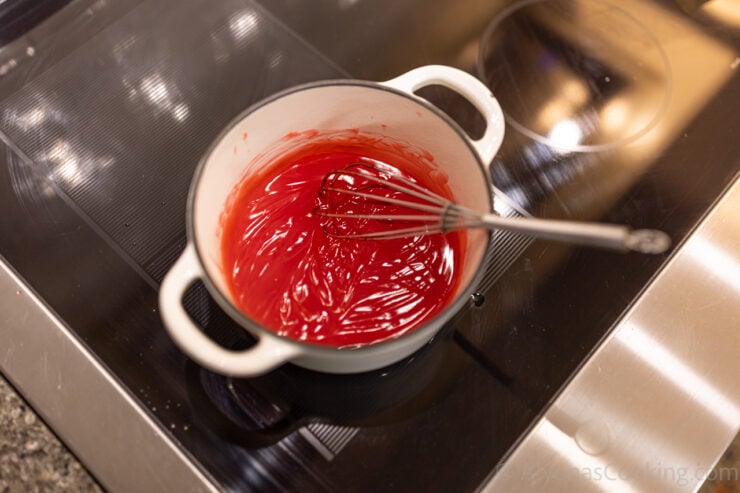
- To make strawberry glaze: In a medium saucepan, combine all the strawberry topping ingredients except for the strawberries. Bring to a boil and whisk until desired thickness (up to 1 minute). Cool before folding in the sliced strawberries. Chill in the fridge before topping.
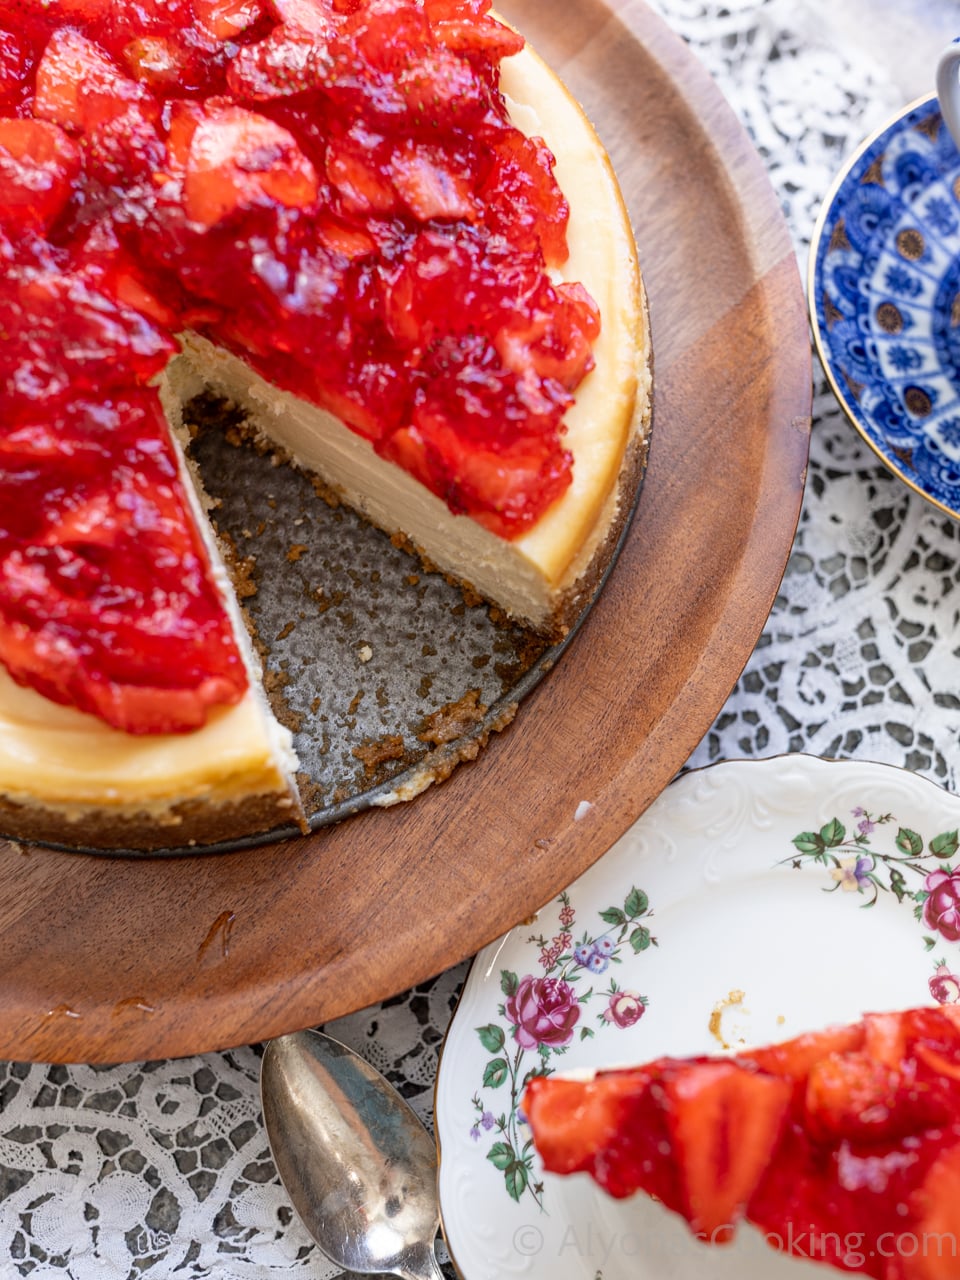
- Top the chilled cheesecake with the strawberry topping. Serve.
Notes
- I used organic cane sugar that is slightly tinted. You could use white refined sugar.
- If using a different brand of graham crackers, you may need to crush and measure the crumbs to have 1.5 cups of crumbs.
- You do not need to grease the pan.
- For the jello I just open a standard package and measure out 3 Tbsp.
- Thermflo can be bought at Amish or Mennonite bulk stores. Use 2 Tbsp for a medium-thick glaze or 3 Tbsp for a thicker glazed topping. It doesn’t leave an after taste like cornstarch.
Nutrition (per serving)
Tried this recipe?
Mention @alyonascooking or hashtag #alyonascooking.